
Long White Gypsy uses affiliate links and is a member of the Amazon Services LLC Associates Program. If you make a purchase using one of these links, I may receive a small commission at no extra cost to you. See my Privacy Policy for more information.
Have you heard about the 10 hiking backpack essentials, but have no idea what they are?
I’ve been hiking regularly for over 5 years now, and I’ve honed my gear list substantially over that time. But when I first got started I’ll admit I had no idea what the 10 essentials for hiking were. I didn’t even know it was a thing. It seemed to be a phrase commonly used in the USA, but not by hikers in the rest of the world (like me in little old New Zealand)!
The truth turned out to be that most experienced hikers are actually carrying the 10 hiking essentials without even realising it.
That’s because what is referred to as the 10 essentials for hiking is actually just a list of gear which will help keep you safe and well on the trails, but may save your life if you get into a pickle.
To avoid any confusion: the 10 essentials should be in your pack regardless of whether you’re going to be out hiking for an hour, or for 10+ days.
So we’re gonna jump straight into a list of the 10 hiking essentials you should always have in your day hiking pack, but after that I’ve also thrown in 7 bonus items that you won’t want to go without either!
10 Hiking Backpack Essentials for Every Day Hike.
1 — Navigation & Communication
You need to have some idea of where you’re going and (ideally) where you are at all times. You also need to be able to communicate if you get stuck.
Below are some suggestions for how you can properly navigate & communicate on the trails.
Paper Maps & Compass
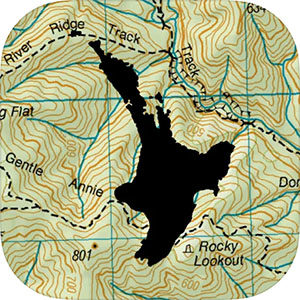
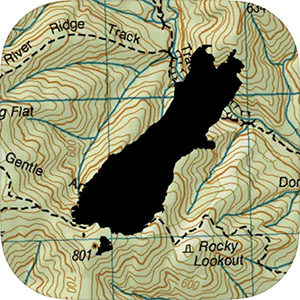
If you have the skills to read a map and locate yourself on it then make sure to carry an updated and appropriate topographical map for the area you’ll be hiking in and a working compass.

✔️ Luminous dials allow for nighttime navigation.
✔️ Clear and easy to read.
✔️ Waterproof, with rubber grip.
If you have no idea how to use a map and compass, now might be a good time to learn. Outdoor Training New Zealand offer training courses around NZ year-round, and Mountain Safety Council also have some great resources on their website.
Phone Apps
If you’re less skilled in map reading, your phone is great resource with a wealth of different apps on offer to both plan your upcoming route or adventure and locate you on a map when you’re out on a trail.
Whether you’re on Android or iOS I recommend paying a small fee for the NZ Topo50 North and South Island apps. These are excellent and beginner-friendly topographic maps which are also capable of using your phone’s inbuilt GPS to locate you on a trail while you’re out in the field.
If you’re an iPhone user, the iHike GPS app is another great app to try. Do some research on what apps might work best for you and test them on trails closer to home before you seek to rely on them in the field.
GPS Device
If you have a little bit more money to spend, consider investing in a proper GPS device. Many of these devices are capable of carrying topographical maps and pre-loaded routes, tracking your progress, email and text messaging, SOS signalling and more. The only downside is that they run off a battery which can run out.

✔️ Adjustable interval breadcrumb tracking.
✔️ In-built SOS button to trigger emergency services.
✔️ Pre-loaded Garmin topo maps.
✔️ inReach messaging.
Communication
A cell phone is the most obvious means of communication for most people. Remember to keep it on you at all times, and conserve the battery as much as possible. You can do this by putting the phone in Airplane mode and selecting its Low Power option.
But cell phone coverage is not guaranteed (even despite the introduction of satellite internet). Which is why a secondary communication device like a Garmin InReach Mini, SPOT device, or Personal Locator Beacon is a key item of day hiking gear in your hiking essentials list.
I recommend always having at least two forms of communication (even if one is only for emergency comms) and carrying an extra battery bank (with charging cables) in case your phone battery dies.
⚠️ IMPORTANT NOTE
Bear in mind that subscription-based devices like the Garmin InReach Mini, Garmin GPS Map 66i and Spot Device will not work if you don’t have an active subscription, which is why I recommend a PLB over a satellite messenger.
2 — Illumination
Always have a working head torch or flashlight in your day hiking pack regardless of whether you’re planning on being out overnight. You never know when you’re going to need it.
If you end up lost at night, a head torch could save your life by acting as a signal to potential rescuers (or the rest of your hiking group if you get separated). It will also help you to avoid further injury by illuminating the terrain, or else help you find an adequate place to shelter.
Choose a head lamp which has at least 300 lumens of brightness, a red light (this is handy for using at huts and campsites so as not to disturb others) and a flashing function for use in an emergency.
Don’t forget a (fully charged) spare set of batteries for your headtorch, or else a battery bank and charging cable if you carry a rechargeable head torch.

✔️ 400 lumen max spotlight.
✔️ Paracord headband to save unnecessary weight.
✔️ USB-C rechargeable battery.
✔️ IP66 water & dust resistance.
3 — Sun Protection
You can get sunburnt in as little as 15 mins in NZ. Within 30 mins you could have third degree burns. NZ’s thin ozone layer (especially from Jan to Apr) means that the sun’s UV rays penetrate much stronger and burn faster.
Although this is bad enough at sea level, if you’re at higher altitude (above 1,000m) the effect is even worse.
This is something which catches out plenty of kiwis, but also a fair amount of international hikers every year. Here are some rules to help you protect against the NZ sunshine:
- Layer up with sunscreen, sunglasses, a good (preferably wide-brimmed) hat, and/or cover up with long layers.
- Pay particular attention to your face, neck, ears and hands.
- Re-apply sunscreen every couple of hours, especially if you’re sweating a lot.
- Take short breaks in the shade whenever you can.
- Drink plenty of water.
4 — First Aid Kit
I highly recommend brushing up on your first aid skills before heading off on your next tramping trip. Red Cross and St John run first aid courses year round across New Zealand, and companies such as Peak Safety and First Training offer outdoor-specific first aid courses.
The following list is recommended as being the absolute basic items you need to carry with you in your essential hiking kit for first aid:
- Antiseptic wipes
- Saline solution
- Band aids
- Bandages
- Sterile gauze
- Wound dressing
- Medical tape
- Tweezers
- Scissors
- Safety pins
- Anti-inflammatories, painkillers and antihistamines
- Emergency blanket or shelter
- Emergency Whistle
Although many trampers (including myself) use a pared back version of this list, it’s a really good place to start (especially for beginners) and depends on the kind of tramping you do.
In addition you should include any personal medications (including plenty of extras in case you get caught out for an extended period of time) for you and other members of your group, including allergy medications for known or potential allergies.
My personal first aid kit also includes items for taking care of foot and muscle injuries (i.e. strapping tape, needle and thread for blister treatment, muscle & foot rub) and insect repellent for those pesky sandflies.

✔️ Compact & lightweight (just 215g).
✔️ Easily identifiable high-viz bag won’t get lost in your pack.
✔️ Includes all the basic first aid items.
✔️ “Large Wallet” version has extra space to include your own personal items.
5 — Fire Starting Kit
Always consider the worst-case scenario: what are you going to need if you get stuck in the bush for a day or more until help arrives?
The first thing that comes to mind is FIRE. Fire is important not just for keeping you warm but also for making hot food and liquid which you can then ingest to raise your body temperature and stave off hypothermia.
Your emergency fire starting kit should include at least the following basics:
- (Dry) Tinder: Collect things along your hike as you see them, such as dry lichens and moss, even tree bark. Store them in a waterproof case or pouch. Otherwise store-bought tinders like firelighters or cotton wool balls covered in vaseline are great options.
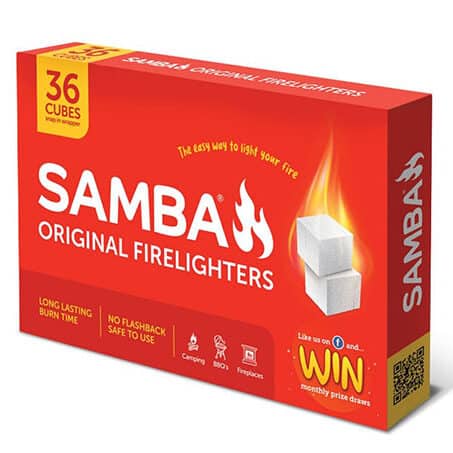
The go-to and easily accessible choice in New Zealand are Samba firelighters, which are available at hardware stores like Mitre 10 and Bunnings, or at your local supermarket.
- A means of striking a spark: Waterproof matches and cigarette lighters are favourites of hiking enthusiasts all over the world. But even waterproof matches can fail to strike and lighters can run out of fuel. A Firesteel or ferro rod is the modern choice and will work every time. Just don’t lose it!

✔️ Includes 1.5m / 5 ft of paracord.
✔️ Works in any weather (even wet).
✔️ Sparks fly at 3,000C / 5,000F.
✔️ Weighs just 70g.
- Be weatherproof: If you take a tumble into a river, or have an unexpected leak, you want to protect your fire starting kit (especially your dry tinder) with your life. A drybag is a great option for this.
6 — Repair Kit
A hiking repair kit should include the kinds of items you may need to repair any of your tramping gear on a whim, or at least could be used to improvised to repair said gear.
My basic tramping repair kit includes:
- Thermarest pad repair kit: This is a pre-made kit with repair patches and tape that came with my Thermarest sleeping pad. I added some DCF/tent repair tape so I know I can repair any major failures of the two most important items in my pack.
- Needle.
- Dental Floss (with the needle can be used to sew anything up).
- Duct tape (wrap a couple of metres around a trekking pole).
- Knife.
You can add anything extra to this list that you like (for example, a length of paracord may make sense for you), but try to opt for versatility and be sensible. You don’t want to be carrying too much extra gear you’ll never use.
A note on knives
The ideal survival knife has a fixed blade that runs the full length of the knife for strength and stability. It’s also helpful to have both a straight and serrated edge (you know, in case you need to fashion a spoon or tent peg from a tree branch). And if you do need to venture into survival bushcraft, having a comfortable grip with a thumb notch can be a real advantage.
When I first started hiking, my knife served a different purpose: deterrence and self defence. As a young, solo, female hiker, I genuinely was concerned about having negative encounters with other humans on the trails.
So I chose to carry a knife I could hang around my neck. This gave me a little more peace of mind, especially when I was hitchhiking.
Since then I’ve become more confident and don’t need something as overtly defensive. I now carry a knife that is more in line with my daily needs (i.e. cutting cheese and other minor utility use), and more lightweight. The only downside is, it won’t stand up well in a survival situation… but I’m ok with that for now.

✔️ Compact and ultra lightweight.
✔️ Folding design with safety locks.
✔️ Comfortable wooden grip.
✔️ Super sharp stainless steel blade.
7 — Shelter
You should always carry a shelter with you on any hike, even if you’re not planning to spend the night (and even if you’re planning to stay in hut).
Heading out into the backcountry without some form of shelter is just plain stupid. If the worst happens and you get lost, or injured, or have to wait out an unexpected storm, a shelter can literally save your life. It’ll keep you out of the worst of the wind and rain, and (hopefully) stave of hypothermia.
The most basic form of emergency shelter is a mylar or foil blanket. These are sold (very cheaply) at most major outdoor retailers (such as Kathmandu, Macpac, Bivouac in NZ) and even some hardware stores (like Mitre 10 and Bunnings). You can usually pick one up for less than NZD 10-15.
A better option is a lightweight emergency bivvy bag or a dedicated emergency shelter. They can be a bit heavier (and more expensive), but they’ll provide much more protection and higher chances of survival in an emergency.
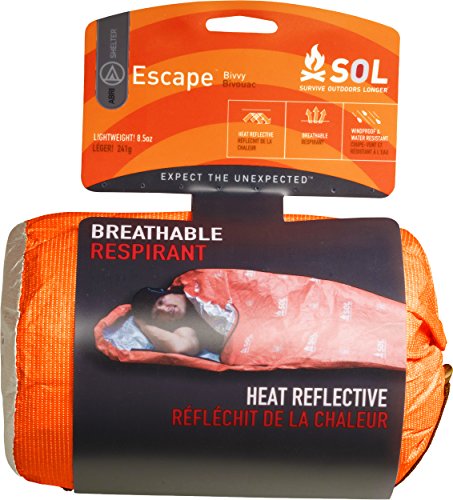
✔️ Just like a sleeping bag, only lighter!
✔️ Durable and water resistant design.
✔️ Highly breathable and heat resistant.
If you’re heading out on an overnight or multi-day trip, always carry a tent. Even if you’re planning to stay in huts. It just makes sense (especially if the hut/s is/are first come, first served and you can’t book a bunk).
8 — Extra (Emergency) Food
It’s more common than you may think for hikers in New Zealand to get caught out by changing weather. Many NZ trails cross rivers that can rise rapidly after heavy rain and become impassable, even in the middle of summer.
So to be safe you should get into the habit of always carrying an emergency supply of food (as well as an emergency shelter – see above) with you.
A good rule of thumb is to make sure you have enough extra food to last a full extra day in the outdoors. If you can carry more, then do so.
Because food is heavy, opt for high energy but compact and easy cook options for your emergency supply. Some good options include:
- Porridge oats
- Cous cous
- Dehydrated potato mash
- Rice flakes
- Cereal and muesli bars
- Chocolate, nuts and raisins or trail mix (scroggin)
If you really want to go the whole hog, there are companies (like this one) who make pre-packaged emergency food rations. Although usually designed for use in civic emergencies, their long shelf life make them a good option for keeping in your day hiking pack.
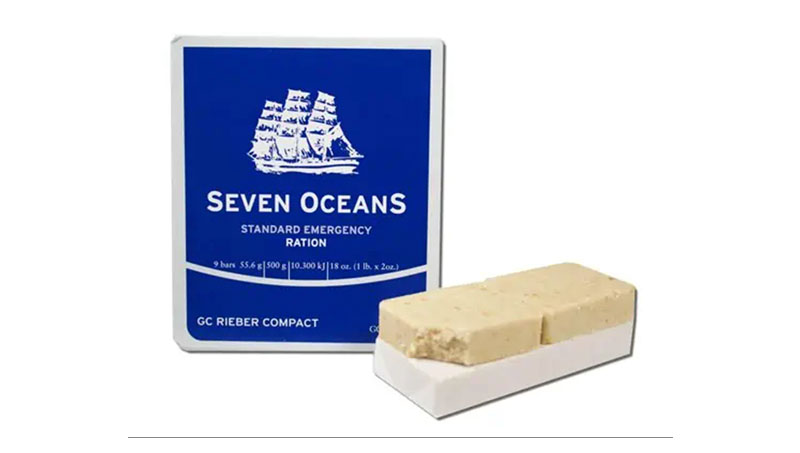
Seven Oceans Standard Emergency Ration
✔️ Contains 3 days of emergency rations.
✔️ 5 year shelf life.
✔️ High ration of balanced nutrition.
WONDERING WHAT TO TAKE HIKING?
Check out my comprehensive gear lists, checklists and reviews in my Gear Centre.
9 — Water
There are three things you need to think about when it comes to water on your hiking trips:
- Where can you get water from;
- How can you treat the water when you collect it; and
- How much are you going to carry (& how)?
Water Availability
Develop a habit of checking ahead on your map (or before you leave) to see where likely water sources are. Ask yourself these questions:
- How long after you start your hike will it be before you come across a viable water source?
- Is there water at the hut/campsite you’re planning to stay at?
- If not, is there a viable river or stream you can collect from?
- What distance are you covering, and will you have an opportunity to fill up along the way?
These questions will help you decide how far to the next water source, and how much water you might need to carry at a time. If you’re heading to a hut or campsite without water it will also help you decide if you need to carry enough water for two or more days.
Water Treatment
Heaps of kiwi trampers will tell you they never filter water when they collect it. Call me crazy but I’d prefer to avoid the risk of giardia or bacterial infection at all costs, so I filter everything I collect.
There are heaps of reasons to be cautious, despite NZs ‘clean and green’ marketing:
- Mountain streams can be contaminated by animal carcasses (especially with NZ’s rigorous pest control regimes).
- Rodents and other animals defecate on hut roofs where water is collected and channelled into water tanks, which you then drink from.
- Animals can fall into the water tanks at huts and campsites and then decompose inside (this happens more often than you might think!).
- Trails through farmland might be contaminated by runoff or stock defecating on or near the track.
- Sometimes humans defecate too close to a water source (even though they shouldn’t).
Invest in a lightweight water filter, iodine tablets or water drops to sanitise and purify any water you drink. Not only is it unpleasant, but contracting a stomach infection in the backcountry can turn into an emergency situation if you end up severely dehydrated from sickness or diarrhea.

✔️ Removes harmful bacteria & protozoa.
✔️ Removes 100% of microplastics.
✔️ Lightweight & simple design.
✔️ Includes two 1L collection pouches.
Water Capacity
How much water you’ll need is a very personal thing depending on how you hike, the terrain and what is available.
I can usually get away with 1 to 1.5L of water for a 4 hour hike depending on the distance and terrain because I’m not a big drinker when I hike. I also stock up on electrolytes at the end of the day.
Keeping well hydrated can help to prevent injuries and dehydration. The more hydrated your muscles are, the more flexible and supple they are.
Most kiwi trampers carry at least 2L of water on their hikes but be prepared to carry more especially if there isn’t a water source at your hut or campsite or if water is often contaminated (e.g. Cape Brett hut’s water supply is often contaminated with salt due to its proximity to the sea).
Make sure you have plenty of capacity to carry all the water you need. Hydration bladders can be a good option, because you can decide how full you want to fill them. Otherwise, collapsible water bottles or pouches can be packed away when you’re not using them.

✔️ BPA, BPS and phalate free.
✔️ Highly packable – flattens & rolls up when not in use.
✔️ 28mm thread compatible with many water filter devices.
✔️ 28mm thread compatible with many water filter devices.
10 — The Right Clothing
Make sure you have plenty of warm and waterproof gear in case you get caught out with a change in weather or an unexpected overnight stay.
Your backpacking essentials kit should include at least the following basics:
- A warm and moisture wicking baselayer (merino wool or polypropylene thermals);
- A waterproof rain jacket, trousers and/or poncho – not just ‘showerproof’, at least 15,000 to 20,000 mm hydrostatic head rating;
- A warm jacket – could be either down or synthetic;
- A warm hat and gloves – even in summer.
- A full set of dry clothing to change into when you get to camp/hut (protect with your life, like your sleeping bag).
Moisture wicking fabrics (such as merino wool and polypropylene layers, and modern tech fibres) will draw moisture away from your skin and dry much faster (even when wet).
Cotton Kills
Cotton is very good at absorbing moisture and holding onto it. If you’re wearing a cotton layer to hike in and don’t take it off at night, the sweat of the day stays close to your skin and cools you down as the temperature drops at night.
Getting your cotton clothes soaked in a rainstorm or by falling into a river can put you at risk of hypothermia because cotton doesn’t dry quickly or distribute moisture away from your body.
And don’t forget your underwear! Many people who are stricken with hypothermia in the backcountry often overlook the fact that they’re wearing cotton underwear. It’s better to be naked than have damp cotton close to your skin!
Beyond the 10 Essentials.
Day Hiking Pack
Top of the list of things to bring on a hike is a hiking backpack.
My personal favourite day hiking pack is the tried and tested 20 litre Osprey Daylite Plus. For longer trips, there are plenty of options out there. Visit your local outdoor retailer to be professionally fitted and to find suggestions specific to your hiking style.
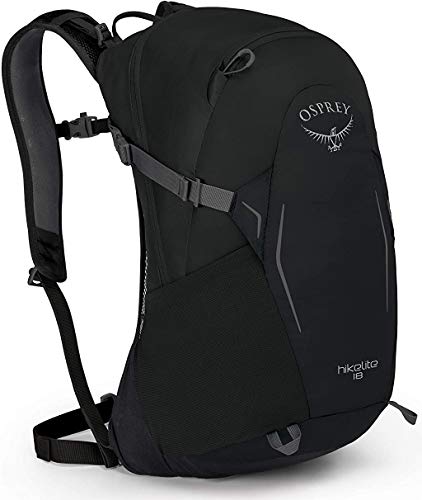
✔️ Upper side compression straps.
✔️ Trekking pole attachment loops.
✔️ Ventilated back panel.
✔️ Integrated rain cover.
Don’t forget your pack liner and a rain cover, to protect your gear inside your pack from the elements. You can go with the stock standard bin bag or trash compactor liner, or splash out on something like this super cheap ultralight pack liner.
Some pack manufacturers include rain covers with their packs, otherwise you can buy a generic pack cover (like this one) for relatively cheap from your local outfitter.
Personal Locator Beacon
Any hiking packing list anywhere in the world wouldn’t be complete without some kind of tracking device.
If you’re going for an extended hiking trip out of cell phone service you should be carrying a Personal Locator Beacon (PLB). Cell phone service can be very limited on the trails, especially where you’re days from the nearest road. If you get seriously injured or lost, you need to have some means of calling for help.
GPS devices, like the Garmin InReach Mini or GPS Map 66i, require a subscription in order to activate the SOS feature. A PLB works without a subscription.
If your budget will stretch, it’s a no brainer to purchase your own PLB.
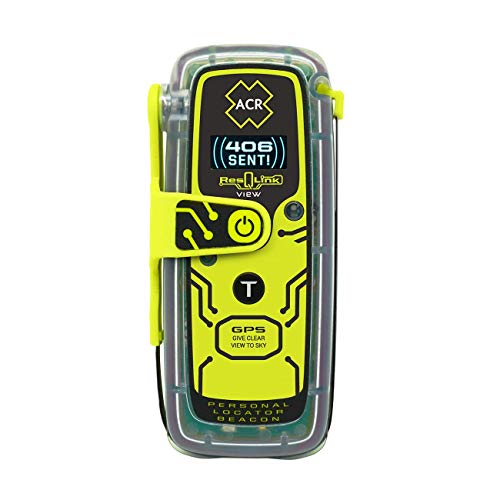
✔️ Uses 121.5 MHz homing signal when triggered (no subscription required).
✔️ Small and buoyant.
✔️ Global coverage.
✔️ LED strobe light for rescue signalling.
They come with a hefty price tag, which often puts people off buying their own. But did you know there are a range of outlets in New Zealand who can hire you a PLB for a nominal fee?
Check in with your local outdoor store (e.g. Macpac or Bivouac), visitor information centre, Department of Conservation Visitor Centre or check this list of PLB hire companies in NZ or this one.
Footwear
A good sturdy pair of hiking shoes is a must for any hiking trip, but you should make sure you’re comfortable as well. Opt for shoes which don’t take long to wear in, dries quickly and has plenty of padding.
For most easy to intermediate day hikes, I find a pair of trail running shoes (like the ones below) to be perfectly sufficient. They’re lightweight, quick drying (so you don’t have to take them off for river or stream crossings) and super cushioned for comfort. If you’re not carrying more than 15kg / 33lb of weight on your back, and you don’t have any ankle or knee issues, this should also be a good option for you.

✔️ Lightweight and quick drying.
✔️ Zero drop between heel and toe.
✔️ Wide toe box so your toes have more room.
✔️ RUNNER’S WORLD 2023 AWARD WINNER: Best Trail Shoe
For longer or more advanced hiking trips, or for those who aren’t comfortable with the lack of support, a sturdy hiking shoe or hiking boot will be a better option. Make sure to try plenty of options before you buy, and have your shoe professionally fitted.
I recommend watching my video on how to choose the right hiking footwear for more tips and guidance.
Toilet Kit
If you’re out enjoying the natural world, we can assume it’s because you think it’s pretty special. But if we don’t look after it, it won’t stay special for long.
In NZ, you’ll see the ‘Poo in a Loo’ campaign everywhere. In short, this boils down to:
- always use a toilet when you come across one.
- if you have to pee or poo, make sure it’s at least 50m / 160ft away from any water sources, tracks and campsites.
- if you have to poo, dig a hole at least 15cm / 6in deep. I recommend something like this to get through the
- try not to use toilet paper (use leaves, moss or other vegetable matter) or use only a little bit — ideally, pack your toilet paper out with you.
- don’t used bleached toilet paper or wet wipes.
- cover the hole (and the toilet paper) with soil and leaves all the way to the top.
This means your toilet kit should include:
- Something to dig a hole with.
- A supply of toilet paper or a portable bidet
- Hand sanitiser.
- Zip lock bag for packing out used toilet paper.
- [ optional ] Compostable bags for bagging up waste & carrying to next long drop or composting toilet. Dog poo bags are great for this.
Trekking Poles
Trekking poles are one of the most highly debated, but also one of the most underrated pieces of equipment for hiking. Although they’re not life-saving enough to be part of the ‘essentials’ list, many people find real benefit to walking with poles.
Trekking poles take a substantial amount of strain off your upper body, as well as your knees and feet when you’re hiking. They’re especially good for going both up and downhill, helping to propel you upwards and lessening the impact on the descent. They come into their own when hiking with a heavy pack.
Because they’re gaining popularity, many gear companies are now manufacturing tents and other equipment which use trekking poles to set up!
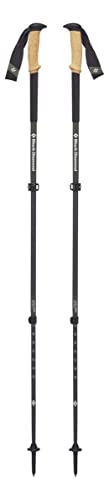
✔️ Cork grip for less sweat and non-slip.
✔️ Easy to use flick-lock adjustments.
✔️ Lightweight but strong carbon fibre.
✔️ Interchangeable tips.
Insect Repellent
If you don’t want to be plagued by clouds of sandflies or mosquitoes every time you take a break, you’ll want to make sure you have some insect repellent in your pack.
These annoying, biting, insects will be almost unnoticeable whilst you’re on the move, but as soon as you stop (or when you get to camp) they’ll be relentless. Thankfully New Zealand has less mosquitoes than other countries, but the sandflies rival them in equal measure.
Most kiwi trampers swear by Bushman, but I’ve had good success with the more natural (and DEET-free) Goodbye Sandfly insect oil.

✔️ A blend of natural essential oils in a sweet almond oil base.
✔️ Easy to pack and use 50ml spray bottle.
✔️ Excellent results against sandflies.
Rubbish Bag
No list of day hike essentials would be complete without a rubbish bag. Even if you’re just out on a day hike, make sure you have a sealable bag or container to put all your rubbish in, so you can pack it out with you.
There’s nothing worse than hiking along a trail and coming across a lolly wrapper, used tissue, crisp packet or worse. As we say here in NZ, be a tidy kiwi and clean up after yourself!
Camera
And last but not least, you’re out there to make memories, after all. So make sure you have something to remember them by!
Whether it’s just the phone in your pocket, or something a little more professional, the best camera you have is the one you have with you. Make sure you have plenty of batteries and storage space to avoid disappointment!

✔️ 24.1 megapixel photos.
✔️ 4k ultra high definition videos.
✔️ Lightweight and compact design.
✔️ Interchangeable lenses.
Hiking Backpack Essentials FAQs.
What should hikers have in their backpacks?
The 10 hiking essentials every hiker should have in their day hiking pack include: a means of navigation & communication, a headtorch or flashlight, sun protection, a first aid kit, a means of starting a fire, a repair kit, an emergency shelter, extra food, a means of treating water and the right clothing. These are discussed in more detail in this article.
What do I pack for a 3 day hike?
If you’re going on a longer multi-day hike, you still want to pack the hiking supplies outlined in this hiking essentials list, but you’ll also need extra clothing, enough food for 3-5 days (including an emergency supply), a sleeping bag, sleeping mat and perhaps a pillow, a tent and something to prepare meals with (like a stove). Check out my overnight/multi-day hiking gear list for more.
Do you need a backpack for a day hike?
No, you don’t need a backpack for a day hike, but it makes it a lot easier to carry the 10 essentials for hiking outlined in this hiking essentials list! If you’re only going for a short day hike (up to 2 hours) in easy terrain, you could use a large bum bag or tote bag. But a proper day hiking pack will be non-negotiable for most hikers, as it’s easier & more comfortable for you to carry your gear.
GOT THE ESSENTIALS COVERED?
Now find out exactly what I pack on a Day Hike in New Zealand to make sure you’re not missing anything.
Final Thoughts: Hiking Backpack Essentials.
Making sure that you’re carrying the basic 10 hiking essentials for beginners in the outdoors will help to keep you safe and prepare you for whatever the weather and conditions can throw at you.
If the absolute worst happens, the 10 essentials for hiking should ensure that your chances of rescue will increase exponentially. Of course, it’s always a good idea to make sure you don’t end up in a bad situation to start with.
Find out more about all the hiking supplies to pack on your next day hike in my comprehensive day hiking checklist.
And as always, if you have any questions about this post or an upcoming trip, or if you think I’ve missed something, please get in touch!