Long White Gypsy uses affiliate links and is a member of the Amazon Services LLC Associates Program. If you make a purchase using one of these links, I may receive a small commission at no extra cost to you. See my Privacy Policy for more information.
Have you been researching gear for your first (or next) Great Walk but are overwhelmed with the conflicting information and number of gear lists out there? Are you struggling to decide what you need to take and what you can leave behind?
Well, you’re in luck because this post is designed to help you choose the right gear for you, your hiking style, and the NZ tramping conditions in preparation for your Great Walk adventure.
Before we get started, let’s first consider some of the key questions you need to ask yourself before you start selecting gear for your Great Walk.
⚠️ IMPORTANT NOTE
The gear discussed in this Great Walk gear guide is suitable for hiking the New Zealand Great Walks during the relevant Great Walks season. You may need to make some changes if you’re hiking outside of the suggested season for each track. Check my suggested Great Walk gear list, Great Walk trip reports and the Department of Conservation website for what gear to pack for each track.
4 Questions To Ask Yourself Before Choosing Your Great Walk Gear.
Things like your experience level, your age, your fitness and who you will be hiking with may affect what gear you need to carry.
These questions are designed to get you thinking about your needs and whether you might need to make any modifications to the recommended gear lists to cater to your circumstances.
1 — How much do you expect your pack to weigh?
Generally, your total pack weight (including food and water) shouldn’t weigh more than 25% of your bodyweight. This is to ensure that you’re not putting any unnecessary strain or tension on your joints or risking an injury.
For the average 60-70kg woman, this means a total pack weight of around 15kg / 33lb.
For the average 70-80kg man, this means a total pack weight of around 20kg / 44lb.
Depending on your pack and its harness system (we’ll come to that later) you may be able to carry more than this without taking on too much extra injury risk or sacrificing comfort.
That being said, a less is more approach will serve you well. Each extra kilogram will take its toll over an extended multi-day trip, even though your pack will get lighter as each day passes.
2 — Are you carrying only your own gear, or do you need to carry someone else’s too?
Although most trampers should be self-sufficient on a Great Walk, there are those who may need to carry some (or all) items of gear for other people.
Parents are the most obvious, as they may need to carry gear for their children (especially young ones). Although it’s important to keep kids engaged and involved by letting them carry their own packs, at most young children should only carry a few very light items (e.g. a jacket, drink bottle and some snacks) leaving you to carry the bulk of the rest of their gear.
Extended groups of adult trampers might share gear among themselves (e.g. cooking gear, food, toiletries, tent components if you’re camping) so that each person doesn’t need to carry as much.
Think about these dynamics before you start accumulating your Great Walk gear as these factors will dictate exactly what you need.
3 — Know What You Need… and What You Can Skimp On
Every Great Walk has its own recommended gear list produced by the Department of Conservation. Mountain Safety Council also has a great beginner’s multi-day tramping gear list. Both contain the 10 Essentials of Hiking Gear you should take with you on any trip.
At a minimum your pack should include all of the gear stated in these official sources, but blogs are also a good source for suggestions on how you might like to customise your gear.
There are certain items of gear that are non-negotiable (e.g. waterproof clothing, a Personal Locator Beacon and at least one full set of dry clothes to change into at the hut).
But apart from the non-negotiables, you don’t need to pack everything but the kitchen sink. A good rule of thumb is to ensure that any other item in your pack either:
- is absolutely necessary for a safe and comfortable trip (i.e. used every day or is lifesaving); or
- has multiple uses to justify carrying it (e.g. a lightweight towel can double as a dish rag).
🔥 HOT TIP 🔥
Don’t rely too heavily on non-official sources. Even though I do my best to ensure that the gear lists I provide are as accurate and true-to-source as possible, each tramper is different and only you can fully understand what you’ll need to stay safe. For inspiration, check out my suggested Great Walk packing list.
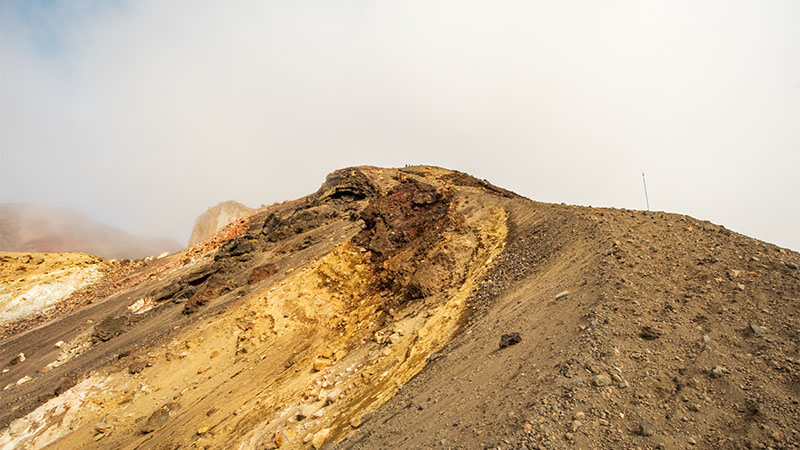
4 — What’s the trail going to be like?
You need to consider the terrain and environment when you’re selecting Great Walk gear.
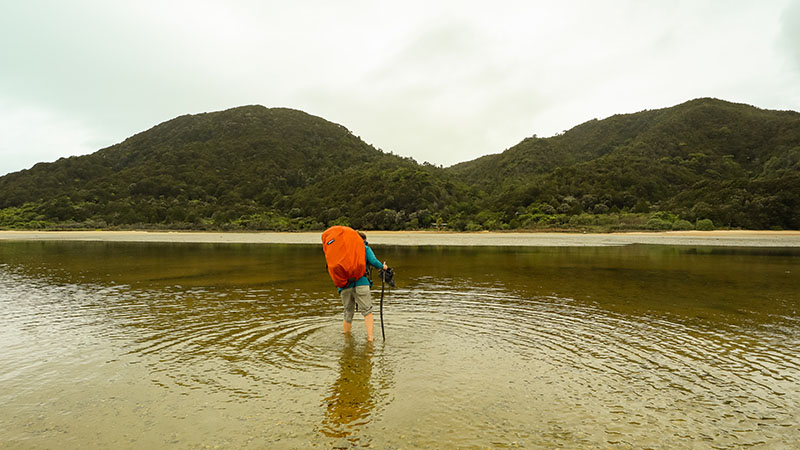
For example, trail runners are a good choice of footwear on the Abel Tasman Coast Track because it’s well graded & maintained and there are lots of estuary crossings. This makes a lightweight shoe which dries fast an advantage.
However, a pair of sturdy boots may be more appropriate on the Milford Track because the terrain is more rugged and most trampers may need more support.
Some gear might actually be completely useless. Hammocks are a good example. Most Great Walk campsites (and indeed many NZ backcountry campsites) don’t have suitable places for hammock camping. So a tent will be a better option.
Use the For Beginners section of this website to find out more about what to expect on NZ trails.
How to Choose Your Great Walk Gear.
Now that you have a better idea of your specific needs, let’s look at the most essential items of gear you should take with you on your next Great Walk.
For a more detailed gear breakdown or my personal Great Walk gear suggestions check out my Great Walk packing list.
1 — Tramping Pack
You won’t get very far on your Great Walk tramping trip without some kind of vessel to carry all of your gear. Just like a handbag is for women, a pack is a very personal item of gear and your choice will depend on your tramping style.
Here are my top 10 tips and pointers for choosing a pack for your Great Walk:
- Capacity — A 40-50L pack will be sufficient for most hikers staying in huts. If you’re camping, a 50-60L pack may be more suitable.
- Weight Range — A solo hiker’s pack should be able to carry a 12-15kg load comfortably. If you’re hiking in a group you may be able to get away with a 10-12kg load.
- Harness — Look for packs with good harness systems (such as Osprey or Macpac packs). These distribute weight more efficiently from your shoulders to your hips making your pack more comfortable.
- Load Lifters — The tramper’s secret weapon, load lifter straps connect the top of your shoulder straps to the inside top of your pack and help to lift tension off of your shoulders. Many cheaper and smaller packs don’t have them, so keep an eye out.
- Lightweight Packs — Unless the rest of your gear is lightweight, don’t be tempted to buy a lightweight pack. Lighter packs are not designed to carry heavy loads comfortably.
- Material — Kiwi trampers swear by canvas packs because of their durability. But they can be heavy and cumbersome. It’s unlikely you’ll have to ‘bush-bash’ through thickets of gorse and dense vegetation on a Great Walk (unless there’s a re-route in place), so you can get away with a lighter and less durable material. Opt for a ripstop variety for more durability.
- Waterproofing — Don’t be fooled by packs that are marketed as ‘waterproof’. No pack is 100% waterproof. But some are more water resistant than others. Look for packs that are seam taped and have been treated with a water repellant coating.
- Pack Covers — Some packs may come with a pack cover but the vast majority don’t. You may not need a cover unless your pack is made from an absorbent material (e.g. canvas). Lighter packs which have been treated with water repellant coatings may not naturally absorb as much water.
- Pack Liners — Even if you don’t use a pack cover, you should always use a pack liner. This will protect everything inside your pack including your most important items like your sleeping bag and set of dry clothes.
- Extra Pockets & Compartments — Don’t be tempted to buy a pack just because it has lots of extra pockets and compartments. You’ll only find yourself buying more gear to fill them. I prefer a single-compartment system with a mesh pocket on the front and a couple of hip pockets. I then organise all my smaller items into stuff sacks inside my pack.
Whatever pack you decide on make sure you have it professionally fitted.
A professional fitting will ensure the weight of your gear is distributed properly and comfortably from your shoulders to your hips to minimise discomfort and injuries.
Many outdoor gear retailers will let you take your gear with you to the shop so you can pack it all in and try out how it feels before you commit to buying the pack.
2 — Sleeping Bag
A good sleeping bag will keep you warm, dry and toasty during the long evenings at camp and is an essential survival item. Whether you’re staying in Great Walk huts or camping, you’ll want to make sure you choose the right sleeping bag.
Here are my top 10 tips for choosing the right sleeping bag for your Great Walk:
- Huts or Campsites — Select your bag depending on your usual sleeping arrangements. If you usually stay in huts (most beginners) you can get away with a warmer rating. If you prefer to camp, you’ll need a bag that’s rated down to a lower temperature.
- Temperature Range — Your ideal temperature range will depend on factors such as your build, gender, circulation etc. In general, a bag with a range of 0C to 6C should be sufficient for hut stays. A bag with a range of -6C to -12C should be sufficient for summer & off-peak camping.
- Comfort vs Extreme — Be aware of rating classifications. The comfort rating tells you the lowest temperature at which you’ll be comfortable. The extreme/limit rating is the minimum temp the bag will keep you alive at. Some brands get their bags officially rated under the EN 13537 / ISO 23537 standards, but some don’t. You may not be able to rely on a temperature rating for a non-tested bag.
- Fill Material — There are two main types of fill material – down and synthetic. There are advantages and disadvantages for both. Down tends to be warmer and more compressible. Synthetic tends to perform better if it gets damp or wet. It’s also easier to clean.
- Weight — Try to opt for a bag which weighs around 1kg. This is likely to be the single heaviest and bulkiest item in your pack so keeping it reasonable will go a long way.
- Compression — Sleeping bags can be bulky items, so the more compressible it is the less space it will take up in your pack. Down insulation is generally more compressible than synthetic insulation.
- Shape — Mummy bags (tapered) are more efficient at keeping you warm than a rectangular bag because there’s less ‘dead air’ for your body to warm.
- Hoods & Draught Collars — A built in hood will help keep heat from escaping through your head and draught collars trap warm air inside your bag rather than letting it seep out as you move. You probably don’t need either if you’re usually sleeping in huts.
- Liners — If you can’t afford to buy a bag which has a low temperature rating (bags get more expensive the lower their lower limit is) you could use a sleeping bag liner. Some liners can add an extra 10-15 degrees celsius of rating and allow you to be a bit more flexible.
- Quilts — Quilts are a lighter, smaller and more versatile option. But they’re not for everyone. Find out more about why I prefer a quilt over a sleeping bag.
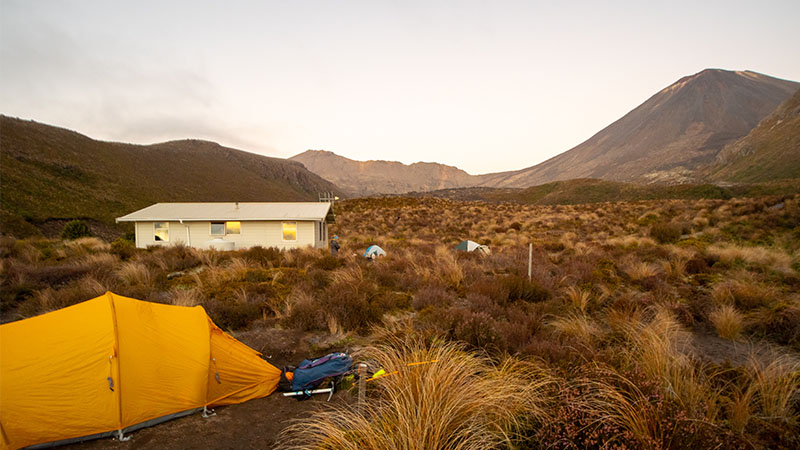
3 — Emergency Shelter
If you’re camping the Great Walks, then your emergency shelter will be your tent. A good tent is one which has a durable and highly water resistant floor (although you may want to carry a tent footprint or groundsheet for added protection), weighs less than about 1.5kg, dries quickly, is freestanding (for flexibility of pitching) and double walled (for insulation and to minimise condensation).
My Zpacks Duplex tent ticks most of these boxes and has been an excellent companion on my trips so far. Watch the full review of this tent in this video.
If you’re not camping, then you should always carry an emergency shelter with you just in case you end up in an awkward situation. This could be something as simple as an emergency survival bag or foil blanket, to a lightweight tarp or bivvy. Whatever you choose, make sure you have everything you need to set it up as a working shelter.
4 — Footwear
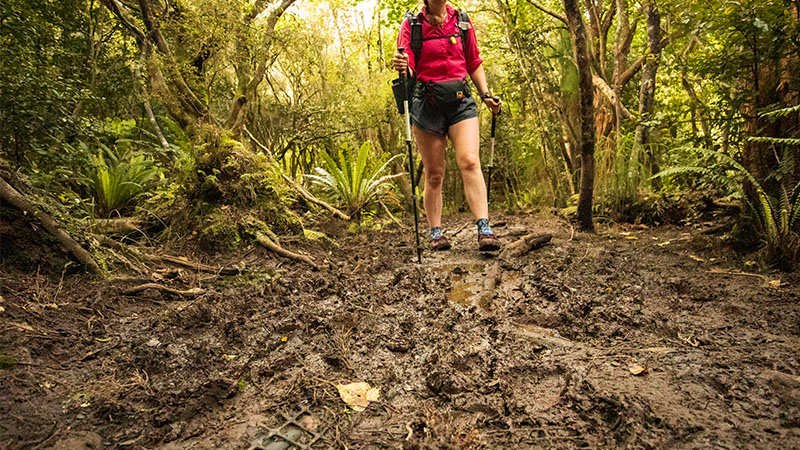
You don’t always need a sturdy pair of hiking boots on New Zealand trails. This is especially true of Great Walks which are usually more easily graded and well maintained.
Trail runners are a popular choice of footwear for outdoor adventurers. They’re cheaper and (usually) more comfortable than boots, lightweight, more breathable and dry much faster. In New Zealand’s typically wet and rainy conditions, this latter feature sure comes in handy!
However, there are some tracks where sturdy boots have their advantages, especially for newer trampers or those who have injuries. More advanced Great Walks such as the Milford, Kepler or Tongariro Northern Circuit are better suited to boots.
The heavier your pack is the more beneficial boots will be than trail runners. Trail runners tend to provide less support under a heavy weight.
If you like the appeal of trail runners but are worried about the lack of support, a hiking shoe might be a good hybrid option for you.
Find out more about How to Choose the Right Footwear for Your Next Hike or Looking After Your Feet When Hiking via these links.
Use this table to help decide what footwear to use on each of the Great Walks:
| TRACK | SUGGESTED FOOTWEAR |
| Lake Waikaremoana | Trail runners or hiking shoes |
| Tongariro Northern Circuit | Hiking shoes or boots |
| Whanganui Journey | Trail runners |
| Abel Tasman Coast Track | Trail runners or hiking shoes |
| Heaphy Track | Trail runners or hiking shoes |
| Paparoa Track | Trail runners or hiking shoes |
| Routeburn Track | Trail runners, hiking shoes or boots |
| Milford Track | Trail runners, hiking shoes or boots |
| Kepler Track | Trail runners, hiking shoes or boots |
| Rakiura Track | Trail runners or hiking shoes |
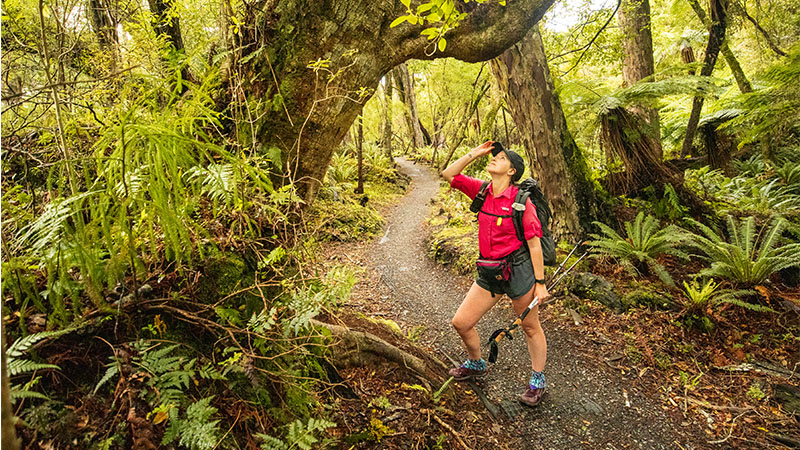
5 — Clothing
Being well prepared with your clothing can be the difference between a safe and comfortable trip and one which can end in disaster.
Here are some rules to follow when choosing the clothing to include in your Great Walk gear list:
RULE 1: Always pack a complete (second) set of dry clothing
Apart from the clothes you’ll actually be wearing when you’re walking, you should always have a complete second set of dry clothing in your pack at all times. You’ll change into this second set of clothes when you arrive at your hut or campsite. This way, even if your tramping clothes get wet or damp from rain or sweat, you’ll always be warm and dry at the end of the day.
RULE 2: Don’t forget your mid-weight layer
New Zealand’s continental climate patterns mean that temperature and conditions vary greatly even in a single day. You don’t want to sacrifice your insulated jacket to the elements, which is why it’s more common in New Zealand for trampers to use a mid layer such as a fleece to keep warm. A mid-weight layer is easier and faster to put on or take off, can be tied around your waist and will still keep you warm even if damp or wet.
RULE 3: Always pack waterproof layers (regardless of the forecast)
And because of those same weather patterns, always pack waterproof layers regardless of what the weather forecast is. New Zealand has a typically wet climate, and when it rains it pours. You may have to endure unrelenting rain for hours on end, and even the best waterproof layers won’t keep you dry for the duration. Some of our Great Walks are located in our wettest regions, for example the Milford Track where it rains on average 182 days a year with the rainiest months coinciding with the peak walking times of December and January.
Investing in a good set of waterproof gear will keep you more comfortable (and drier) for longer. Look for clothing with at least 15,000mm hydrostatic head rating and made from a 2 to 3 layer fabric.
RULE 4: Overpack your socks, not your undies
If you’re going to overpack anything, it should be your clothing. In New Zealand conditions, you can never have too many layers! But if you’re wondering where you can save a bit of weight I’d suggest taking one less pair of underwear and instead carrying an extra pair of socks.
For a typical 4 day trip, pack two pairs of underwear and three pairs of socks. That’s two pairs to hike in (change out every second day so the other pair can air out) and one pair to sleep in.
How to Layer your Tramping Clothing
Start with a full set of thermal baselayers (long sleeved top and long johns) layered under a t-shirt or singlet and a pair of shorts. Shorts trump trousers because NZ’s climate can be hot and humid. Base layers can be taken off if you’re too hot. A long sleeved hiking top can be worn over a singlet or t-shirt during the day to protect against the harsh kiwi sun.
Over the top goes your rain jacket (mid-thigh length will give a bit of extra protection) paired with a rain skirt or rain trousers. If you’d prefer not to wear waterproof bottoms (they can make things very hot and sticky) you could instead use knee-length gaiters. Not only are these great for keeping rain out of your shoes and off your bare legs, but they also give protection against prickly plants and shrubs, small stones and biting insects (like sandflies).
A warm or insulated jacket plus a beanie and gloves round out your kit, and should be packed regardless of the season or weather forecast.
6 — First Aid & Emergency
Keep your first aid kit as minimal as possible. The most common types of injuries you’re likely to sustain on the trail are cuts, scrapes, minor strains and sprains or insect bites and stings. If it’s anything worse than that, you’ll probably need to call for help regardless.
Check out my post on the 10 Essential items of gear for an idea of what to include in your first aid kit. A few plasters and large bandages, antiseptic cream or wipes, anti-inflammatories and painkillers, a bit of strapping tape, bite cream and antihistamines will get you through most tramping-related injuries. And of course, don’t forget your own personal medications and any specific requirements.
7 — Don’t Forget…
With all of the most important items of gear covered, there’s space for a few other bits and pieces which most trampers will benefit from:
- Torch / Headlamp — Ideally with a red light setting to ensure you don’t disturb other hut/campsite users if you need to get up for a toilet break during the night.
- Rubbish Bag — For packing out all your used packaging, scrap food and other bits and pieces. There aren’t any rubbish bins at the huts or campsites so be a tidy kiwi and follow good tramping etiquette!
- Toothbrush — Because no one likes bad breath or that furry feeling. Pack a biodegradable toothpaste if possible.
- Emergency Toilet Kit (trowel, toilet paper and hand sanitiser) — Whereas all huts and campsites will have toilets, the urgent need might strike whilst you’re on the trail so be prepared.
- DOC Booking Confirmation & ID — You’ll be required to prove you’ve booked and paid for your bunk or campsite, otherwise you might be liable for extra fees. Print out your confirmation and seal it in a ziplock bag for reference during your trip.
- Earplugs — To drown out the din of tired trampers snoring.
- Camera — To capture all of the stunning scenery you’ll be seeing along the way!
8 — And Finally, Some Optional Extras
Every tramper is different, so there may be other items which you wish to carry on your trip. Here are some of the most common optional extras that I see out on the trails:
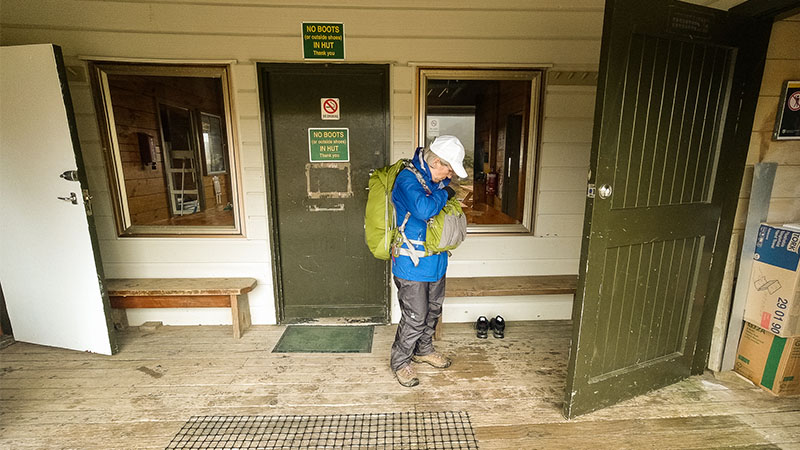
- Hut Shoes — Outside shoes and boots aren’t allowed in the huts, which means you’ll be left with just socks if you don’t have a pair of hut shoes. A lightweight pair of sandals, jandals or even crocs can be a great option for running to and from the toilets.
- Trekking Poles — For extra balance, stability, easing strain on knees, legs and arms, helping to propel you up mountains and much more! A real asset to any tramper.
- Cards & Games — At many Great Walk huts you may find a stash of cards and games, but not all so it can be a good idea to bring your own, especially if you bore easily or have children to entertain.
- Pillow — A pillow is a nice luxury item and can help with a good night’s sleep. There are many varieties of lightweight inflatable pillows, or you can create your own by stuffing your extra clothing into a spare stuff sack.
- Book or E-Reader — An average walking time of 4-6 hours per day and a lack of television mean you’ll have plenty of time to finish (or start) that book. Make sure you have a source of light for nighttime reading (which doesn’t disturb others).
Final Thoughts: Gear for the Great Walks.
Learning how to properly assess what gear you need on a Great Walk and what you can get by without is an integral part of being safe and prepared on the trail. I hope this post has given you some good suggestions for what to take on your next adventure! If you’d like any more advice on what to include (or not include) in your Great Walk gear list, please contact me.
If you enjoyed this Great Walks packing list post, please take a moment to help me spread the word to other trampers and hikers by sharing it on Pinterest or social media.