Long White Gypsy uses affiliate links and is a member of the Amazon Services LLC Associates Program. If you make a purchase using one of these links, I may receive a small commission at no extra cost to you. See my Privacy Policy for more information.
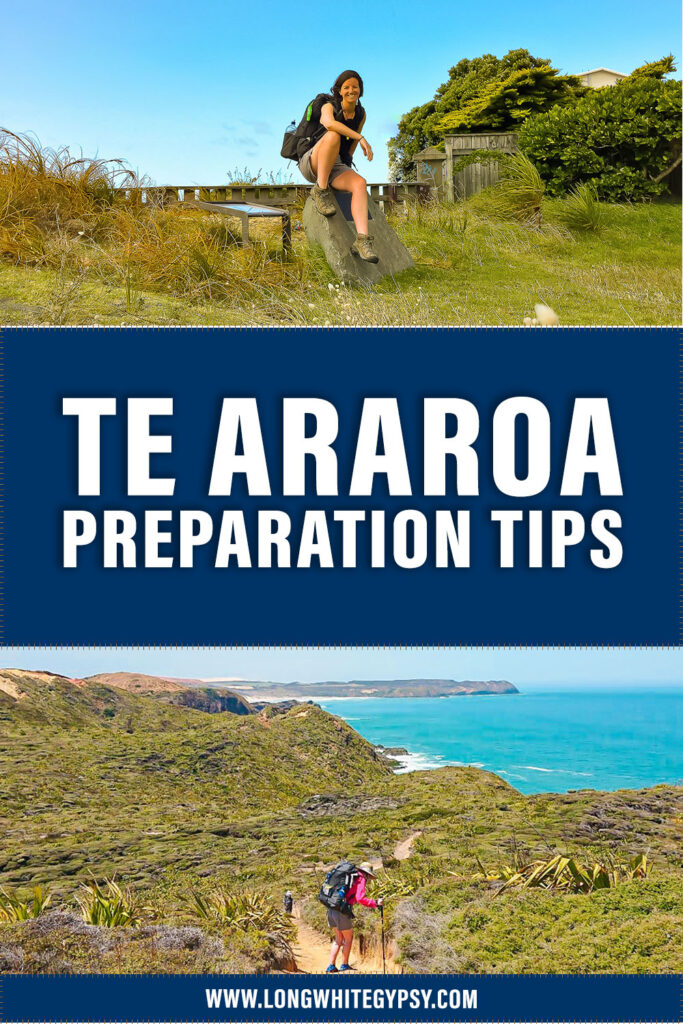
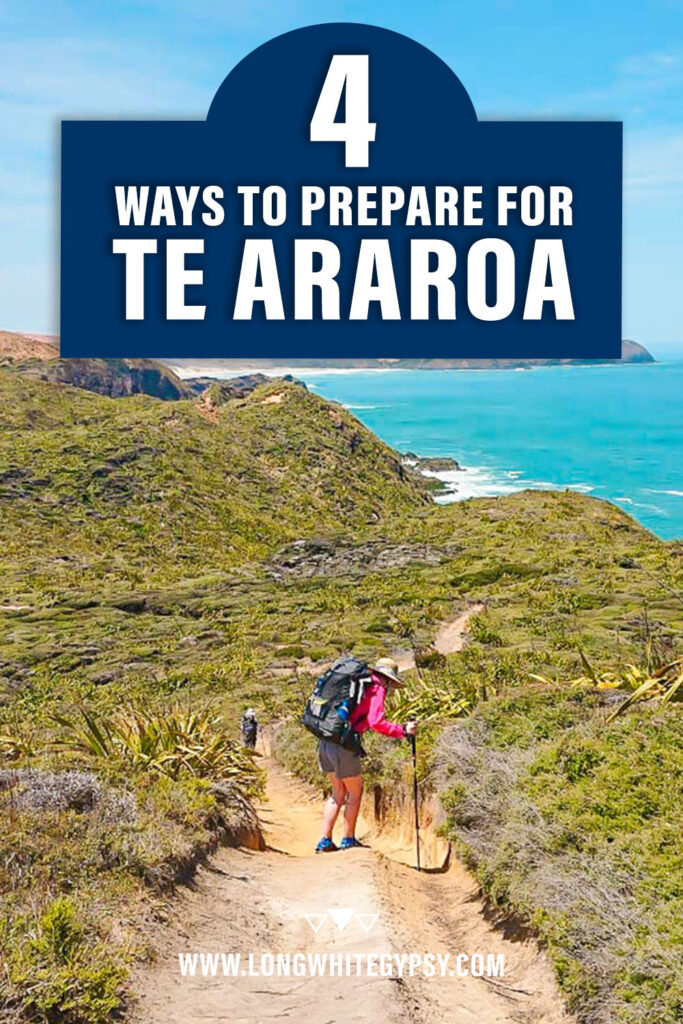
Preparing for a big adventure like thru hiking a long distance trail for 4-6 months can be a daunting exercise. There’s gear, food, water, accommodation, fitness weather and much more to think about and if you want to stay safe you need to be flexible enough for all contingencies.
Although you can’t possibly prepare for every aspect of your adventure (things will always go wrong or need to change), there are some things you can do to set you in good stead for a successful thru hike.
The following Te Araroa preparation tips are designed to help you get ready for your upcoming thru hike of Te Araroa (New Zealand’s Long Pathway) to take a little bit of pressure off before you set foot on the trail.
prefer to watch?
Watch the full video by clicking play below.
Buy your ‘Big 3’ Gear Items.
For those who are new to tramping, hiking or thru hiking, you will often hear people refer to their Big 3 gear items. These are the non-negotiable, essential gear items required for an extended hiking trip, and include:
- Backpack
- Sleeping Bag
- [ Sleeping Pad ]
- Tent
Some people lump their sleeping bag and pad together as one item, and hence refer to their ‘Big 3’ items. Others choose these as separate, and refer to the ‘Big 4’.
I managed to secure two of my Big 3 items relatively early on: my pack and my sleeping bag. I am still waiting to purchase my sleeping pad and my tent.
Pack
Zpacks Arc Haul 62L
I knew pretty early on that I wanted an ultralight backpack. This was confirmed when I began researching the advantages and disadvantages of ultralight vs. regular backpacks.
Ultralight Packs
Advantages:
- Lightweight
- Flexible
- Customisable
Disadvantages:
- Less Durable
- Can’t carry as much weight
Regular Packs
Advantages:
- Durable
- Can carry heavy loads
- Complex harness systems to help pack ride more comfortably
Disadvantages:
- Heavy
- Bulky
- More features than you need
After trying on a couple of Osprey and Gregory packs, I quickly concluded that their bulky harness systems and heavy pack weights were simply not worth it. Why would I purchase a pack that already weighs 2-3kg / 4.5-7lb before I even start packing it?
I knew I wanted to keep the base weight of my pack (the weight of all my gear minus fuel, food and water) to well below 10kg, meaning I’d only have 7kg to play with.
After reading a couple of blogs and watching some YouTube channels, I soon noticed that many ultralight backpackers were using one of two manufacturers: Zpacks or Hyperlite Mountain Gear.
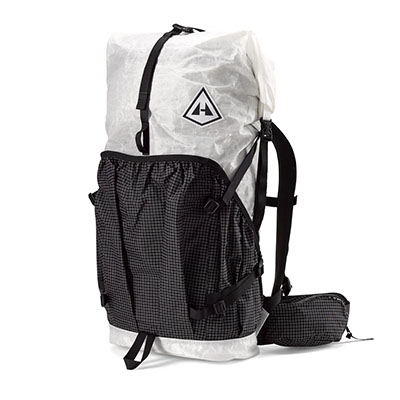
If I had to choose from their range, the Hyperlite Mountain Gear HMG Southwest 3400 was my pick of the bunch. The pack has a 55L volume and it has a roll-top closure (which I really like for versatility). The pack is made from Dyneema Composite Fabric (DCF) material, a well-tested and hardwearing material that can withstand the harshest of environments. It also has three exterior pockets (one on the front, two on the side) and built-in belt pouches. It is fully fitted with a hydro port (for those people who like to use hydration reservoirs) and a foam back panel for comfort. Finally, a version of the Southwest is used by Sarah Wilson (my all-time favourite anxiety blogger and sugar-quitter), so it has the fangirl tick of approval, and it helps that it also weighs in at a feathery 910g / 2lb. All in all, it seemed a pretty great pack and very affordable at a cool USD $345.
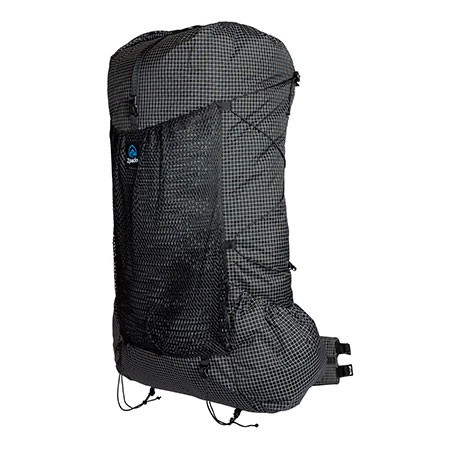
The Zpacks Arc Haul 62L was the second contender. Truth be told, it is pretty much identical to the Southwest 3400, but has an extra 7L of storage space. I knew it would be more of a financial investment for me. Zpacks pride themselves on offering completely customisable products, but this comes at a cost. The base version of the pack would set me back USD $299 which, on the surface, looks cheaper. But add to that the USD $50 for two hip belt pockets, and various costs for other optional add-ons and all of a sudden this becomes the most expensive option. I would, however, be able to choose separate torso lengths and hip belt sizes, and the hip belt is interchangeable so there was the possibility I could use this pack for years to come as my body changes. In addition, instead of a foam back panel, the Arc Haul uses Zpacks’ arc system to aid with ventilation.
Perhaps the main factor which decided me on the Arc Haul, though, was the weight. In its base form the pack weighs an unbelievable 22.6oz / 642g. If I was going to achieve my goal of keeping my base weight down, it was pretty clear the decision I had to make. It also helped that my newfound idol, Jessica “Dixie” Mills, swapped the Southwest 3400 for the Arc Haul as her pack of choice halfway through the PCT (giving it the Dixie seal of approval).
Sleep System
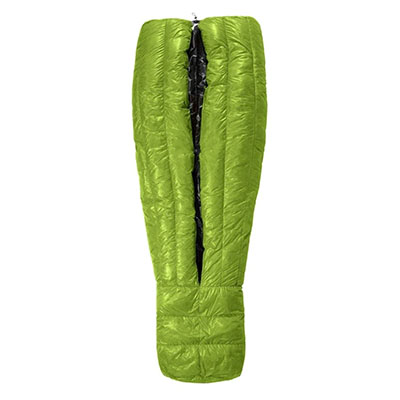
Enlightened Equipment Enigma 10 Deg Quilt
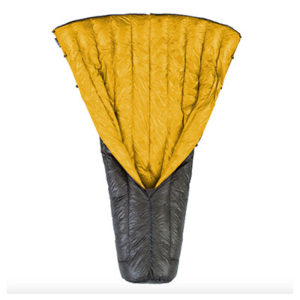
I’ve been a camper most of my life, so I’m no stranger to sleeping bags. When I purchased my very own recreational tent a few years ago, I started taking a duvet camping with me. With the onset of my anxiety issues, being zipped into a mummy bag was becoming more and more claustrophobic and triggering, so it made sense for me to look at quilts as a potential sleeping option.
In any event, I usually ended up unzipping my bag and using it much like a quilt anyway, so it seemed silly to carry the extra weight of a full back zip and back panel.
I’d never heard of quilts before I started researching ultralight hiking gear, so this was a fairly new concept to me. The more I found out about them, the more I liked the idea.
Again, it really only came down to a couple of brands: Zpacks or Enlightened Equipment. Both offer ultralight sleeping bags and quilts. Being a cold sleeper, I knew I wanted a bag that would keep me (and my feet) warmer, rather than cooler, so I decided to focus my attention on 12 C / 10 F temperature ratings.
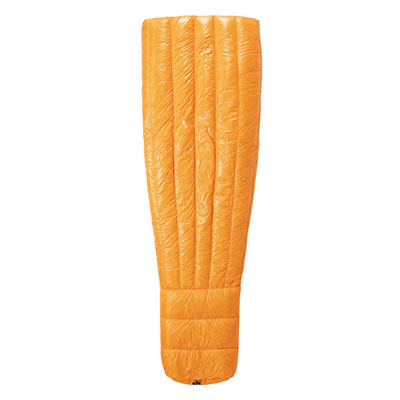
From Zpacks, I tossed up between the Solo Quilt and the Classic Sleeping Bag. For a Medium length, Standard width Quilt or Bag, the specs are as follows:
Zpacks Solo Quilt 10F / 12C
- Fill: 950 DownTek goosedown
- Fill Weight: 504g / 17.8oz
- Total Weight: 667g / 23.5oz
Zpacks CLASSIC Bag 10F / 12C
- Fill: 950 DownTek goosedown
- Fill Weight: 504g / 17.8oz
- Total Weight: 671g / 23.7oz
From Enlightened Equipment, I only considered quilts, and narrowed my options down to the Enigma and the Revelation. For the 12 C / 10 F Regular length and Regular width versions of each, the specs are as follows:
Enigma Quilt 10F / 12C
- Fill: 850 DownTek goosedown
- Fill Weight: 526g / 18.55oz
- Total Weight: 692g / 24.42oz
Revelation Quilt 10F / 12C
- Fill: 950 DownTek goosedown
- Fill Weight: 547g / 19.31oz
- Total Weight: 736g / 25.95oz
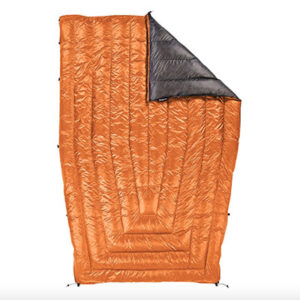
From a weight perspective, the Zpacks products are far superior. However, there were two main reasons why I eventually chose the Enlightened Equipment Enigma.
Firstly, the price. The Enigma set me back USD $335, whereas the Zpacks Solo retails for USD $379 and the Classic for USD $399.
Secondly Zpacks had a two week lead time to manufacture their quilts/bags, whereas I could buy a stock version of the Enigma and have it to me within a week. This was important, as I was in the US at the time of ordering and due to fly home within a couple of weeks!
Thermarest Neoair XLite (Womens)
There was really no contest when it came to a sleeping pad for the trail. I sort of always knew I would end up purchasing the Thermarest XLite.
For a start, the standard version is incredibly lightweight, weighing in at just 340g / 12 oz. The women’s specific version (which is slightly shorter) also weighs in at 340g / 12oz, but has an R-value of 3.9 (instead of the standard’s 3.2).
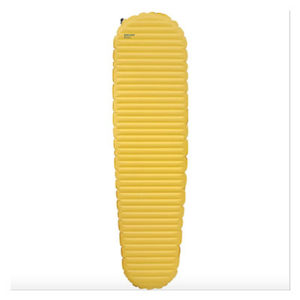 As with my sleeping bag/quilt, I wanted to prioritise warmth. I tend to be a cold sleeper, and I know that there is a good chance of a few cold nights out on the trail. Making sure I can stay as warm as possible will not only set my mind at ease, but should also keep my anxiety at bay so I can get some decent sleep. With that in mind, the R value of a sleeping pad will give you an indication at how insulated the pad is, and therefore how warm you can expect to stay. The larger the number, the warmer the pad will be. An R-value of around 3-4 is great for 2-3 season camping.
I also wanted to make sure I was comfortable. I’ve slept on closed cell foam pads before. Let’s just say that these don’t work for me. I’m not a predominantly side, back or stomach sleeper, which means I tend to spend a lot of the night tossing and turning. So my pad needs to be as versatile as possible.
There are some downsides to the Thermarest XLite. I have read reviews which say that they are prone to popping (or at least leaking), which is a concern. But I think all the pads come with a field repair kit regardless. There is also a general consensus that the XLite pads are perhaps the noisiest on the market, akin to sleeping on a chip packet. In addition, the sound of the valve deflating early in the morning is apparently loud enough to wake an elephant (I’m good with this, as long as it doesn’t wake the bears).
So for now, despite the fact that I haven’t purchased it yet, it is likely that I will be adding the Women’s XLite to my gear collection.
*There is a small chance I may purchase a Neoair XTherm instead. This is because the XTherm has an R-Value of 5.7 (which is crazy!), BUT it comes at an 85g / 2oz weight sacrifice, and there is a probability that a pad with an R-value that high would simply be too hot for the majority of my trip.
Shelter
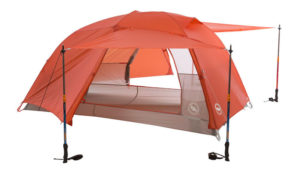
Zpacks Duplex
I’ve spent a lot of time weighing up the advantages and disadvantages of the various backpacking and hiking tents on the market.
Having been a camper for much of my life, I have always preferred double walled tents. They have the added benefit of allowing air to flow more easily between the layers, which can have the effect of keeping you warmer (or cooler as the case may be) and also prevent the build up of condensation. However, there is a growing trend towards single walled tents in the hiking (and especially the ultralight hiking) community.
This post is already too long for me to go into the decision making process in any detail (this will come later on) but once again it came down to a matter of weight.
 I really like the look of some of the lightweight Big Agnes tents. I’ve had my eye on both the Copper Spur UL2 and Tiger Wall UL2 tents for some time, and I think I can still say with some confidence that if I decided the extra weight was worth it, I would definitely go with one of these two tents. They both have two vestibules (which I prefer) and adequate storage space inside, including a little pocket in the tent ‘roof’ where you can stash a headlamp at night so you don’t have to wear it.
However, at the end of the day, the weight (and price) compromise just wasn’t worth it. These tents weight anything up to 1.4kg / 3lb, which is mammoth in comparison to the 550g / 19.4oz of the Duplex.
 The Zpacks Duplex tent is a whopping 2.3 m x 1.14m and it has large vestibules on either side. In addition, it is made from high tensile DCF material which is guaranteed to be tough (and I don’t have to carry the additional weight of a tent footprint). There is no additional weight for tent poles as the Duplex is pitched with trekking poles, and the entire tent only requires eight stakes to pitch. Being ultralight (and therefore desirable) the tent costs nearly as much as a small car. But, I’m confident it will be worth the investment in the long run.
get fit
Long Distance Day Hikes
If you’re going to attempt to walk 3,000 km in a little over 4 months carrying 15kg on your back, you’d better be fit enough for the task. That’s why I’ve started early with my fitness preparation.
I’ve completed a lot of day hikes to date, but many of them have been quite short and over relatively easy terrain. In the coming months I’ll be focussing on hiking with a full pack over some rougher terrain.
Luckily, living in the Central North Island region, I am blessed with a wealth of great trails. Some of those I am considering hiking with a full pack to test my stamina include:
- The Kinloch to Kawakawa Bay Track (18km / 5 hr)
- The Whakaipo Bay to Kinloch Track (14-23km / 4 – 6 hr)
- The Tarawera Trail (15km / 4 hr)
- The Tongariro Alpine Crossing (19.4km / 5-7 hr)
Many of these I have already hiked before, so I know that they will be good options for training hikes. But the Tarawera Trail is a complete unknown to me, and it will be a different experience hiking the Crossing with a fully loaded pack.
Overnight / Multi-Day Trips
From a stamina perspective, I’m also planning to complete at least one overnight or multi-day trip over the coming summer. I am told (reliably) that day hiking is one thing, but putting a pack on every day and hiking for 4 to 8 hours can start to wear on you for a while, and the only way to prepare for the mental drain is to get out there and do it.
There are two option I’m currently considering.
- The Lake Waikaremoana Great Walk – 46km / 3-4 days
- The Round the Mountain Track – 66km / 4-6 days
These are both fantastic options for the summer period, and are both handily located within a 2 hour drive from home. My biggest problem will be with finding someone to come along for the ride with me. I may be trying to push my boundaries, but heading out on my very first multi-day hike completely solo may just be too much for the anxiety to take.
Upskill yourself
Having not grown up in the bush, there are some pretty obvious skills that many people possess that I just have no nose for. Trying to keep myself alive no matter what mother nature may throw at me is not one of them. And considering the decision making part of my brain is quite often fogged up by a cloud of anxiety, there are many safety considerations I have to make that are not necessarily essential for others.
Rivers are the biggest killer in the outdoors in New Zealand. They are, quite simply, underestimated. Which is why I decided a non-negotiable for this trip was to book myself onto a River Safety course to learn more about how rivers work, and also learn how to safely (if possible) cross them.
My next biggest area of up skilling I would like to prioritise is navigation. I have heard many accounts of hikers getting lost on the trail. Partly this seems to be due to people relying too heavily on electronic maps and GPS (which can all too often fail), and partly because people underestimate how quickly the weather can change in NZ making it impossible to see the trail or the markers. The advice which is frequently doled out is that anyone embarking on an expedition of this nature should, at the very least, be able to locate themselves on a paper map. I did a little bit of orienteering when I was younger, but I bet I’d be surprised at how much I’d forgotten.
Having already undertaken one of these courses, I would strongly recommend anyone who is planning something of this nature also make an effort to prepare themselves from a skills perspective before they leave. The ability to make good decisions under pressure can be the difference between life and death in the New Zealand backcountry, and the more opportunities you take to develop these skills, the safer you will be in the long run.
Outdoor Training New Zealand run some fantastic courses on a regular basis throughout New Zealand, and I would highly recommend them to anyone looking to develop their outdoor skills for the New Zealand environment.
If you found this Te Araroa preparation guide helpful, please take a moment to help me spread the word to other trampers and hikers by sharing it on social media.