
Long White Gypsy uses affiliate links and is a member of the Amazon Services LLC Associates Program. If you make a purchase using one of these links, I may receive a small commission at no extra cost to you. See my Privacy Policy for more information.
Are you new to hiking in New Zealand or just want to explore tracks and trails in a different region of the country than you usually hike in? With a vast network of trails and plenty of technical terrain there’s plenty to consider before selecting your next New Zealand hike.
In an effort to assist your decision making, here are my 10 Top Tips for How to Choose a Hiking Trail in NZ to bear in mind when you’re selecting your next tramping adventure.
1. Experience Level.
When deciding how to choose a hiking trail in NZ, your experience and confidence level is always the first consideration to take into account.
Ask yourself questions like:
- Are you new to hiking in general, or just trails like this one?
- Are you from another country, and it’s just that you don’t know a lot about NZ hiking trails? If so, I recommend you start with my comprehensive Hiking in NZ for Beginners section of this website.
- Are you confident on this kind of terrain?
- Do you know how to read the weather and conditions?
- Are you comfortable with the method of navigation?
If you’re not completely new to hiking, think about whether most of your experience is on day hiking tracks (typically much easier and closer to civilisation) or if you’ve done a few overnight tracks or had exposure to multi-day trips. Has your only exposure to multi-day tramping been on the Great Walks (if so, we’ll cover this later on)?
If you’re unsure about any of these, keep reading on as much of the rest of this post contains other factors to help assess your experience level for tramping in NZ.
2. Fitness Level.
When thinking about how to choose a hiking trail in NZ, consider how long it’s been since you last went for a decent walk. Was it a week ago? A month? Where was it? An urban setting, or something a bit trickier than that? Hill climbs, or flat terrain?
If it’s been a while I’d recommend getting yourself back into a pattern of walking at least 3-5 kilometres on a regular basis before you attempt a decent day hike. Build up to tracks that will take you around 2 hours to complete.
Once you’re comfortable on shorter hikes you can start to look for longer tracks (4-5 hours) before moving up to full day adventures (6 – 8 hours). Be careful not to take on too much too soon. If you’re trying a new trail see if you can go along with someone who has more experience than you just in case you get into trouble.
If you have any physical handicaps or illnesses which might prevent you from hiking for multiple hours with weight on your back, talk to your doctor about how you can treat and/or mitigate these.
3. Location.
When deciding how to choose a hiking trail in NZ, I suggest beginners try to explore tracks and trails which are close to them to start with, then gradually expand their horizons.
If you choose a trail which is close to you, you’re more likely to be aware of typical weather and track conditions. This will help keep you safer as there’s more chance you’ll be well prepared.
Once you’re more experienced, start venturing into different terrains and territories. Initially aim for environments which you’re comfortable with (i.e. if you spend a lot of time on forest trails, stick to those for the time being). Choose well worn pathways and trails first, then move up to more advanced tracks with fewer people.
Also consider how long it will take you to get to the trailhead. Are you attempting an out and back trail or is it a loop (more on that in a little while). Will you require pre-booked transport or a shuttle to drop you off or pick you up from a trailhead? If so, how far in advance do you need to book?
4. Time of Year.
Some trails can be completed (relatively) safely all year round, but others should only be attempted (especially by beginners) at certain times of year. If you’re not sure, ask more about seasonal track conditions at the local DOC Visitor Centre or on an online tramping forum.
Pay particular attention to seasonal hazards you might encounter along the route e.g. river crossings, excess mud and snow/ice or avalanche conditions. Even well-worn and popular tracks (e.g. the St James Walkway and Milford Tracks) can be prone to avalanches in the winter time!
Unless you’re in alpine territory, rivers are the biggest seasonal hazard to be aware of. New Zealand is prone to high rainfall events all year round which can make rivers rise rapidly and unexpectedly.
If you have river crossings on your route, before you go make sure to check:
- Whether they’re bridged (bridges are often removed during the off-season so they don’t get damaged)
- If unbridged, whether there is another safe place to cross or an alternative route around
- How full the rivers tend to run at this time of year
- The rainfall forecast in the headwaters during the week before your trip
And don’t forget that it gets dark earlier in spring, autumn and winter than it does in summer, meaning you’ll have less daylight for your trip. Always take a headlamp and make sure you start early in the day to avoid getting caught out.
5. Popularity.
The more people there are on a track, the more likely you’ll be able to get help if you need it. It can be a good idea for beginners to start with popular day hikes and overnight trips (such as the Great Walks) until they get familiar with how the tracks and trails work.
Popular tracks have more facilities (e.g. toilets & weather forecasts) and popular overnight tracks usually have bigger huts with wardens over busy seasons.
But popular trails come with their own problems, especially when it comes to parking and hut/campsite capacity. Parking is limited at popular day hikes (e.g. Roy’s Peak in Wanaka and the Tongariro Alpine Crossing) so you’ll need to organise shuttle transport. And accommodation may fill up quickly on popular overnight trips (e.g. Mueller Hut in Aoraki Mt Cook or Sunrise Hut in the Tararuas) so you’ll either need to book in advance or have a backup plan if you can’t get a bunk.
More experienced trampers usually want to get away from the hustle and bustle of busy trails. So as you get more experienced you can start to opt for less popular tracks.
6. Distance / Duration.
When considering how to choose a hiking trail in NZ (especially if you’re from overseas) know that most tracks in NZ are graded according to how long they will take an average hiker to complete, not the distance. Find out more about the track grading system in NZ here.
Track distances can be found on the DOC website (or Plan My Walk app) but it’s more common to find time estimates instead on track signage. This is because terrain and conditions determine how long it might take to complete a track, and even easy tracks can be difficult in bad weather. A 12 km stretch on easy terrain in a dry region may take only 3.5 hours to complete, but that same 12 km trail in a wet region with lots of elevation gain and other hazards might take 8-10 hours.
I recommend beginners start with tracks around 2 hours in duration before progressing to 4 hour trips and eventually full-day (6-8hr) adventures. Be cautious when selecting tracks which are longer than 4-5 hours as they’re usually much more advanced.
Check and double check distance and duration before setting out. Pay special attention to whether the track is:
- A loop track (i.e. starts and ends in the same place)
- An out and back trip (i.e. starts and ends in the same place, but takes the same route on return)
- A point to point track (i.e. starts in one place and ends in another and requires transport arrangements)
Don’t forget to plan plenty of time to stop and take breaks. And don’t forget to check that the distance and time estimate for the track includes the return journey. If you’re not sure, ask the local DOC Visitor Centre.
➕➕ BONUS TIP
DOC time estimates are based on what it would take an ‘average’ hiker in the fitness & condition expected of that kind of trail to complete the track. For example:
A beginner hiker attempting an ‘Easy’ 2 hour track might complete the track within the expected timeframe, but an amateur hiker may shave off 30 mins.
An experienced hiker attempting an ‘Advanced’ 6 hour track might complete the track within the expected timeframe (or a little longer depending on conditions) but an amateur hiker may add 2 hours (or more) to that time.
7. Terrain.
New Zealand has a vast variety of different terrains and our track network explores almost all of it. When considering how to choose a hiking trail in NZ, choose terrains and environments that you’re comfortable with and regardless of your experience level never stray too far from your comfort zone.
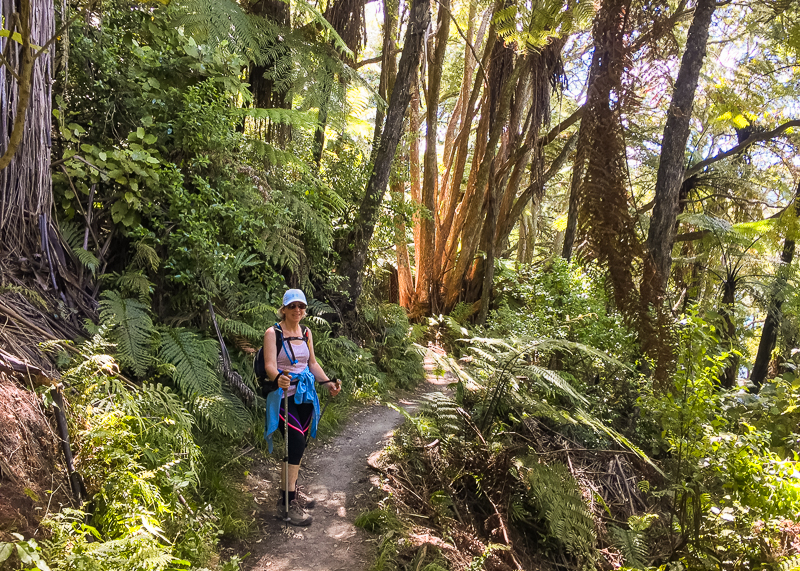
Beginners should start on urban pathways or well-trafficked routes which aren’t far from main centres. As experience increases they can build up to forest tracks and mountain trails with greater elevation. To prepare for steep tracks build your fitness gradually on hill climbs beforehand so you don’t tire as easily.
If you’re new to a particular type of terrain (or in a different region) gradually build your experience by starting on shorter and less difficult tracks first. The more you hike, continually evaluate how you perform on different tracks.
Watch out for the following when researching the route you’re planning – some may be found even on ‘Easy’ graded tracks:
- River crossings – Check if river crossings are bridged. If not are they safe to cross on foot or is there an alternative route around?
- River sidles – If the map shows a section of track following a river, bear in mind this may take you directly up the riverbed or (worse) on a narrow, slippery and possibly high ledge beside it.
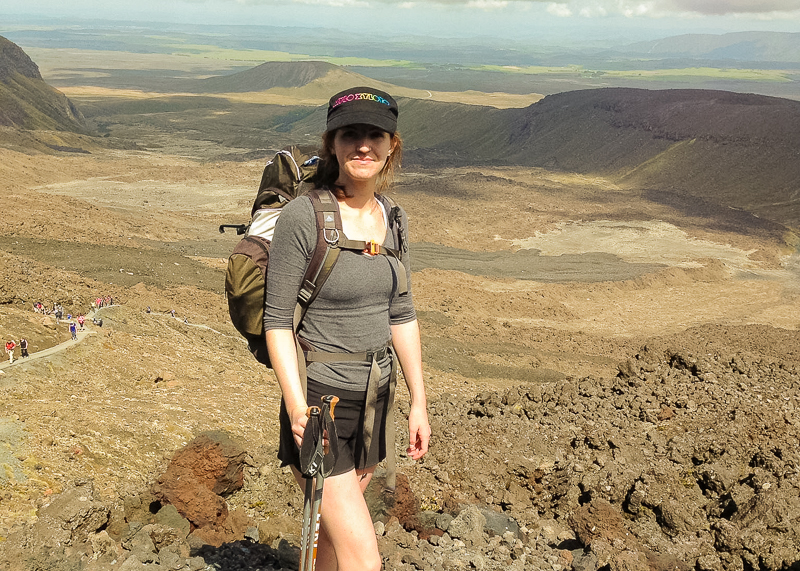
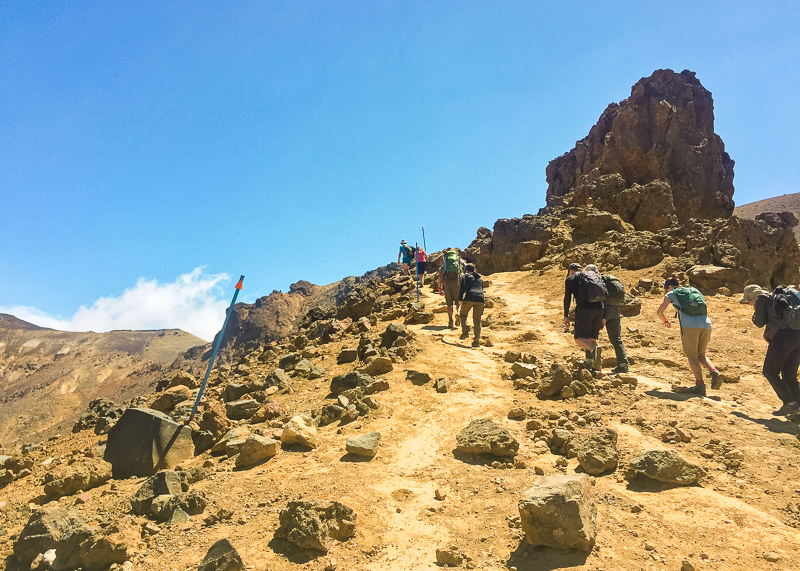
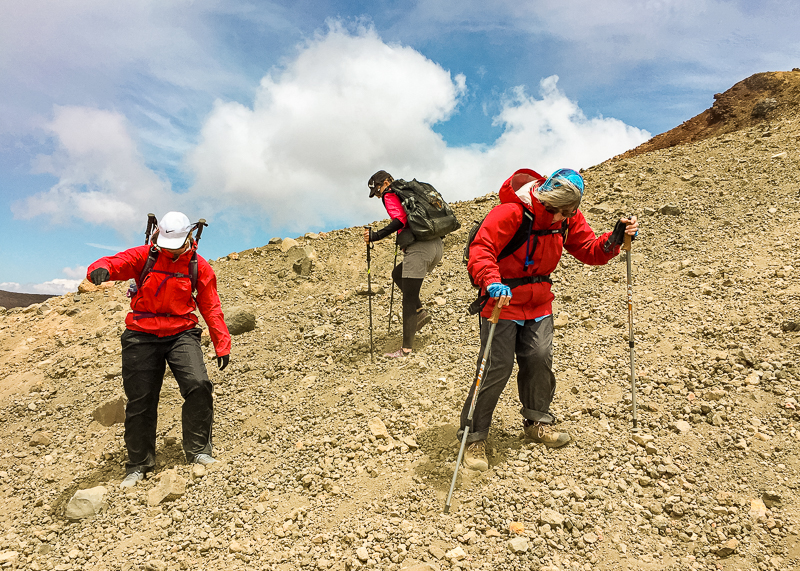
- Rock scrambles / Scree slopes – Common on mountain passes and at high elevations. Be prepared for steep drop offs, loose gravel, and clinging to boulders. If in doubt, check with DOC before you attempt.
- Steep climbs – NZ doesn’t do switchbacks. We go straight up and over mountains. This is hard on your fitness, but it’s also steeper and more dangerous. Climbing up is the easy part. Be prepared for sore knees and slippery terrain (especially in the wet) on the way down.
- Exposure – Be prepared for steep drop-offs, narrow ridgelines, high winds, long periods of exposure to the blistering sun, and pelting rain.
8. Difficulty.
When deciding how to choose a hiking trail in NZ know that every DOC track in NZ is graded for difficulty. Use this link to find out more about track grades in NZ or read my in depth post about the 4 types of tracks in NZ.
Easy tracks are very simple and not very strenuous. They are designed for people of all ages and abilities (with some exceptions) and should take no more than 1-2 hours to complete.
Intermediate tracks are good introductions to multi-day tramping but require more preparation. The tracks are usually wide, flat, and gravelled to give hikers easy access to some of our most remote and beautiful regions. All of the Great Walks are Intermediate level tracks.
Advanced tracks make up the majority of the NZ track network. Hikers shouldn’t attempt these tracks until they either have a lot of experience or are going with a more experienced party or guide.
Some other good indicators of how difficult a track is include:
- Elevation Gain. This is the total amount of climbing you’ll do across the distance of a trail. It can indicate how difficult a track is when compared with distance and can even help you choose the right direction to hike in. For example, the elevation gain from Ketetahi Rd to Blue Lake on the Tongariro Alpine Crossing is a whopping 965m (with more climbing still to Red Crater), whereas the more popular direction (Mangatepopo to Red Crater) only involves 748m elevation gain.
- Ease of Navigation. Is the trail clearly marked, or are there sections where there are no markings? What kinds of markers are used (easily spotted orange triangles, or a poled route with cairns?). Are maps required or is there a well-cut and easy-to-follow track with signage at all junctions?
9. Weather.
Always, always, always check the weather before you set out on a hiking trip in New Zealand. It doesn’t matter whether you’re planning to be out for a few hours or a few days, NZ is an island nation with a tropical climate. Weather can change rapidly and lead to disaster.
Research and understand the usual conditions in the area you’ll be hiking. What elevation will you be at for the majority of the hike? What are the usual weather patterns? Is the region prone to high periods of rainfall, thunderstorms or snow?
Don’t forget that weather in large open spaces like towns and cities will be different to weather at remote higher elevations. Even if the forecast is for fine weather, always bring your rain gear and an extra layer of warm clothing. But most importantly, don’t ever underestimate the weather. If you’re not sure, stay put or turn back.
10. Hiking Solo or in A Group?
And finally, when deciding how to choose a hiking trail in NZ think about whether you’re going to be undertaking your trip on your own, or as part of a group.
Different considerations apply to each scenario.
If you’re hiking solo, be prepared to be self sufficient. Although you’ll have a better understanding of your fitness and experience level, it’s easy to make bad decisions when there’s no-one to bounce ideas off of (especially if a trail isn’t as you expected it to be). Take plenty of food (plus extra for emergencies) and a reliable means of communication (including a PLB) and navigation, even if you’re heading for a well-marked track. Tell people where you’re going, when you plan to be back and when they can expect to hear from you. And don’t forget your warm/dry layers and an emergency shelter.
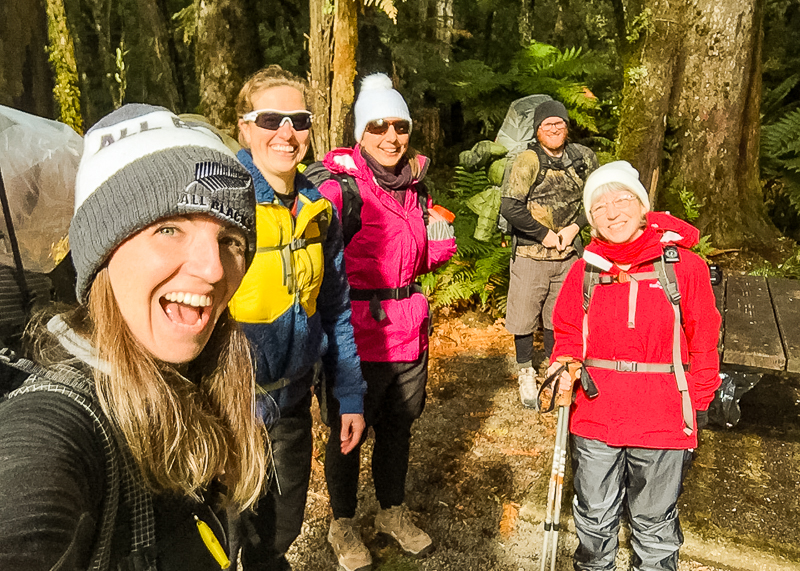
If you’re hiking in a group, then these responsibilities can be shared between group members so there’s not as much pressure. If you can, hike with people who have more experience than you so you can pick up skills along the way (great for overnight trips). Always consider the age and experience level of all group members and take note of existing medical conditions. Choose trails which are suitable for the least experienced person and build from there. Continually check in with group members to make sure they’re feeling safe and comfortable.
Regardless of whether you’re hiking solo or in a group, be prepared to turn back at any time and for any reason. It’s better to call a trip quits early and return home safe, than it is to risk not returning at all.
Bonus POints.
Research, Research, Research.
Read official sources (i.e. DOC, Plan My Walk, Mountain Safety Council) and reviews to get a good picture of what to expect. Make sure to thoroughly research any trail you’re planning to attempt and get some local information, either from forums such as the Tramping in New Zealand Facebook forum or ask at the local Department of Conservation Visitor Centre. Mountain Safety Council’s Plan My Walk app and website incorporates many DOC trails and is a helpful interactive tool (especially for beginners) to help plan the logistics of your journey.
Don’t Use the Great Walks as a Litmus Test
New Zealand’s network of 10 Great Walks were designed to get even the most inexperienced trampers out into our most beautiful places, but they aren’t typical of all multi-day tracks in NZ. Just because you’ve found a Great Walk easy, doesn’t mean you’ll fare the same on another multi-day track. Before moving on to a higher grade track, make sure you complete a number of tracks at the lower grade first. And if you’re heading to a new region always start fresh with easy tracks first rather than heading straight for an advanced track in unfamiliar terrain.
Don’t Use Social Media as an Official Source of Info
Instagram, TikTok and Facebook are not reliable sources of information when deciding how to choose a hiking trail in NZ. Although online communities such as the Tramping in New Zealand Facebook page can be very helpful, always take advice on these forums with a pinch of salt. After all, you have no idea what the experience level of the person giving the advice is! A pretty picture or catchy video on someone’s Instagram or TikTok account doesn’t reveal the death-defying feats the photographer had to take to get there. Many outdoor creators I follow on social media are also accomplished trampers or even mountaineers. I wouldn’t dream of attempting some of the trips they routinely take.
Final Thoughts: How to Choose a Hiking Trail.
When deciding how to choose a hiking trail in NZ, especially if you’re overseas, you need to be aware that there are some different considerations to take into account than what you may be used to.
Even experienced trampers sometimes find NZ tracks and trails more advanced than they were expecting, so use the tips in this post to familiarise yourself with what to expect and learn how to plan properly for a safe trip.
If you enjoyed this post about how to choose a hiking trail in NZ, please take a moment to help me spread the word to other trampers and hikers by sharing it on Pinterest or social media.

