
Long White Gypsy uses affiliate links and is a member of the Amazon Services LLC Associates Program. If you make a purchase using one of these links, I may receive a small commission at no extra cost to you. See my Privacy Policy for more information.
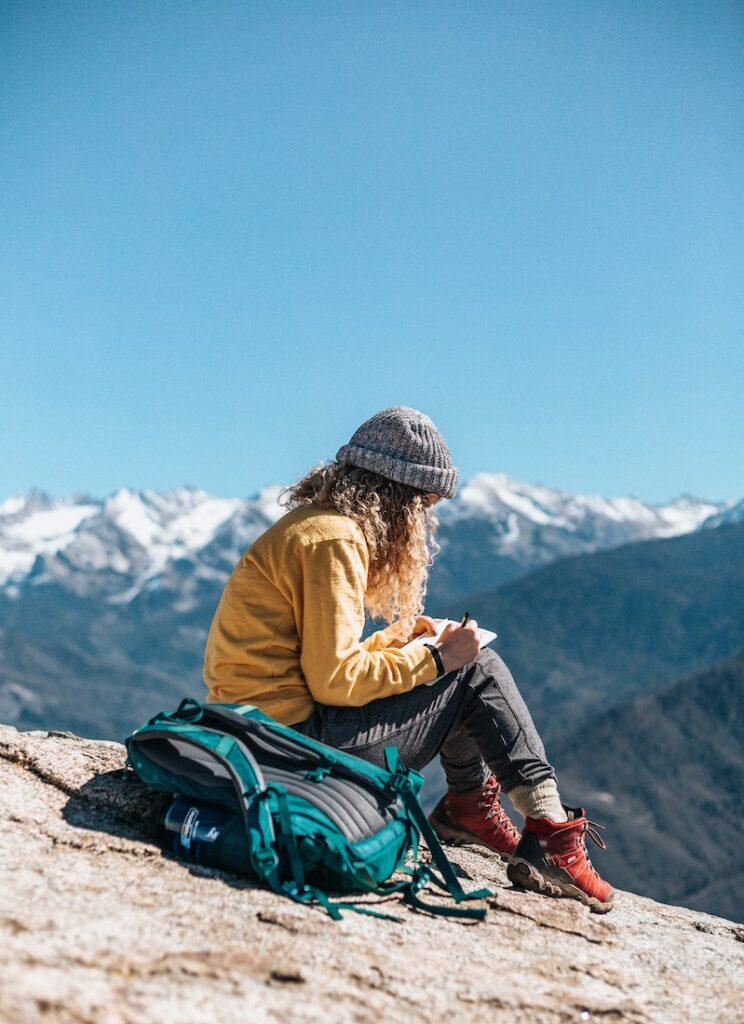
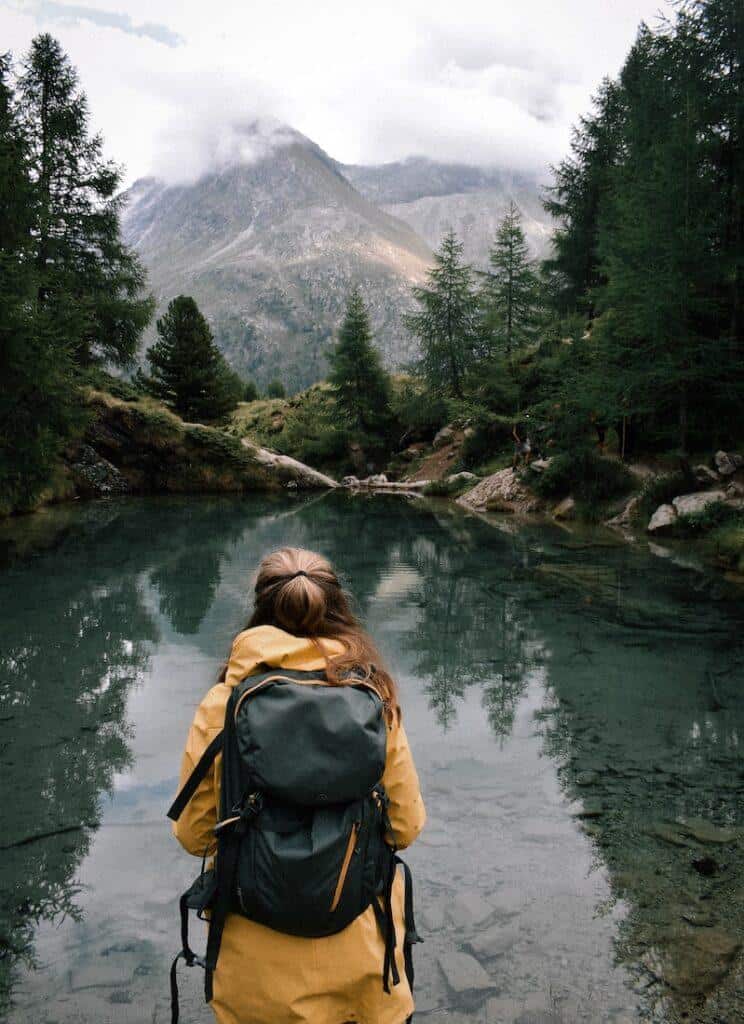
In this post I want to share with you some of my top tips for hiking alone because solo hiking requires all the same skills as hiking in a group, but when hiking solo you alone are responsible for your safety.
Hiking alone can carry more risk than hiking in a group. If you’re new to hiking, you’ll find these tips helpful for having a safe & enjoyable trip.
But before we get started, if you’re new to hiking in general, you’re also going to want to check out the Hiking for Beginners section of this site.
The lessons and tips I teach there will encourage you to think about all the things you need to do as you plan your first (or next) hiking trip.
I’ll briefly touch on some of these things here because there’s a lot of crossover.
But my focus in this post is how you can (safely) get started hiking alone.
1 — Do your research
My first tips for hiking alone is to do your research.
Take the time to read up on the track you’re planning to hike, and familiarise yourself with its conditions, terrain and potential hazards. Also check the weather forecast for that day so you can pack accordingly (although bear in mind you should always pack for contingencies, regardless of the forecast – more on this below).
Do a quick Google search of the track you’re planning to hike and see what information is available. Prioritise official sources over third-party reports like blog posts and videos. Specifically, check for any hazards you’re likely to encounter (e.g. slips, landslides, avalanche paths, unbridged river crossings) and whether any section of the track is closed.
If there’s an option to call or contact a local ranger (to find out what current conditions and hazards are on the track, always take that option first.
🔥 HOT TIP FOR HIKING ALONE 🔥
Rangers will be able to give you an accurate upcoming weather forecast and unique feedback on how weather is likely to affect the track. Find out more about what questions to ask a ranger when researching a track in this post.
2 — Choose a track which isn’t too difficult for you
My second tips for hiking alone is you’ll want to make sure you choose an appropriate track for your skill level and abilities. Regardless of your experience level, choose a track which you already know is easy for you.
🔥 HOT TIP FOR HIKING ALONE 🔥
Solo hiking is not the time to push yourself.
This might mean repeating tracks and trails you’ve already hiked with a group. But this is a good thing because it means you’ll already be familiar with these tracks. Subconsciously you’ll know what to expect, and as a result you’ll naturally be more prepared.
Start with tracks which are closer to home. You’re more likely to know what to expect on these tracks. You might have already hiked the trails before in a group. But you’ll also better understand local weather patterns and terrain simply because you live there.
Choose tracks where you’re likely to encounter plenty of other hikers. Solo hiking doesn’t necessarily mean being completely alone – other people will be out enjoying the trails too, and this will provide a nice buffer for you if you get into trouble.
Start with day hikes before you consider building up to overnight trips. And gradually build up the distances you cover. Solo hiking can take more of a toll on your body physically and mentally because you have to carry more gear and make all the decisions yourself. Even over short distances you might become more tired, so be aware of this and be prepared for it.
Finally, aim for tracks where you’ll have cellphone reception. If things go wrong, you need to have the peace of mind of knowing you can call for help if you need it. Calling or texting someone on your phone is the easiest way of doing this.
If you absolutely have to venture outside of cellphone coverage (because there’s no other choice) then take an emergency communications device with you, such as a satellite messenger or Personal Locator Beacon (PLB).
3 — Be prepared
Tips for hiking alone number 3 (which actually should be tip number 1 because it’s the main overarching rule to follow when attempting any kind of hike) is to be prepared. This will help ensure you’re ready for any emergency that arises and help you to identify and respond to potential risks.
You might think being prepared only applies to the gear you take on your trip. This is true, of course (and i’ll talk more about this in a moment).
But it also means completing all of the other steps mentioned in this post.
Unfortunately, being prepared tends to focus on what happens if things go wrong. As humans we don’t like planning for the worst. But let me tell you from experience. In the unlikely event that anything does happen while you’re on a solo hike, you’ll feel much better knowing that you’re well equipped for anything Mother Nature or the trail can throw at you.
Now that’s been said, here’s some of the best ways to be prepared for a solo hike:
Always pack the 10 essentials
There’s actually a list of 10 essential items of hiking gear which every hiker should pack on every trip.
I hadn’t even heard of the 10 essentials until I was researching a video about what to pack on a day hike. This list is commonly referenced in the USA, but is probably known as something else in the rest of the world. Think of it as the most important items of gear to take on any hiking trip. Usually, it’s a list of basic survival items. You can find the full list in this post.
It’s important to remember that the 10 essentials is not a comprehensive list of gear for the track you’re attempting. It’s just the bare minimum you should pack to stay alive.
To find out more about what to pack for a specific hiking trip you can visit the Gear Lists section of this website.
Always pack a first aid kit
The 10 essential items of gear includes a first aid kit. First aid kits are important on hiking trips because they contain the items you’ll need to treat any minor injuries or illnesses that might occur while you’re out in the wilderness.
Take a wrong turn on a track? You might need antiseptic and plasters for deep scratches. Collect water from an untreated source? You might need immodium to keep your bowels in check. Got a headache from mild dehydration? Paracetamol.
🔥 HOT TIP FOR HIKING ALONE 🔥
Add extra items to your first aid kit which are specific to your own needs. For example, if you have an allergy then make sure you carry the appropriate medication with you.
You can tailor your first aid kit depending on the type or length of hike you’re attempting.
For a short day hike, a lightweight basic first aid kit which contains just the essentials will be fine. For longer trips, a more comprehensive first aid kit covering things like minor sprains and injuries should get you through. Read this post for a suggested list of basic first aid items to include in your kit.
Always pack an emergency shelter
Similarly, an emergency shelter is another non-negotiable item of gear which I often see forgotten.
Whenever I’m second guessing whether to include my emergency bivvy in my day pack, I always imagine myself lost, cold and wet in the bush struggling to stay warm whilst I wait for help to arrive.
It might not look like much, and it might not be comfortable, but setting up a basic tarp or shelter if you’re lost or injured can be the difference between life or death. You’re also more likely to stay mentally alert if you’re dry and protected from the elements.
Always pack warm and waterproof clothing
And again, regardless of whether it’s the middle of summer and 40 degree temperatures, never forget to pack your warm and waterproof layers.
This might come from my background hiking in New Zealand, but you need to recognise and be aware of the changeable nature of weather (especially if you’re heading into high terrain above 1,000m a.s.l.).
It’s always possible for that bright, blue, sunny day to turn into strong wind, pelting rain and even hail/snow. Of course, this will depend on where you’re hiking and what the normal weather patterns are. But it’s always better to be prepared for the worst.
Opt for lightweight warm and waterproof layers where possible so that the temptation to leave these items at home is lessened.
Always take more food & water than you’ll need
Food and water are life. If you don’t have food for three days, you’re going to be very uncomfortable. If you don’t have water for three days, you’ll die.
Again, the biggest barrier I see to carrying extra food and water is the weight. People seem to have an aversion to carrying more than they need because it’s heavy. But even just an extra 500ml of water, and a couple of extra muesli or protein bars can make a difference.
If you know you can definitely collect water along the way, you might not even need to carry extra water. You can simply pack a filtration device and collect it when you need it.
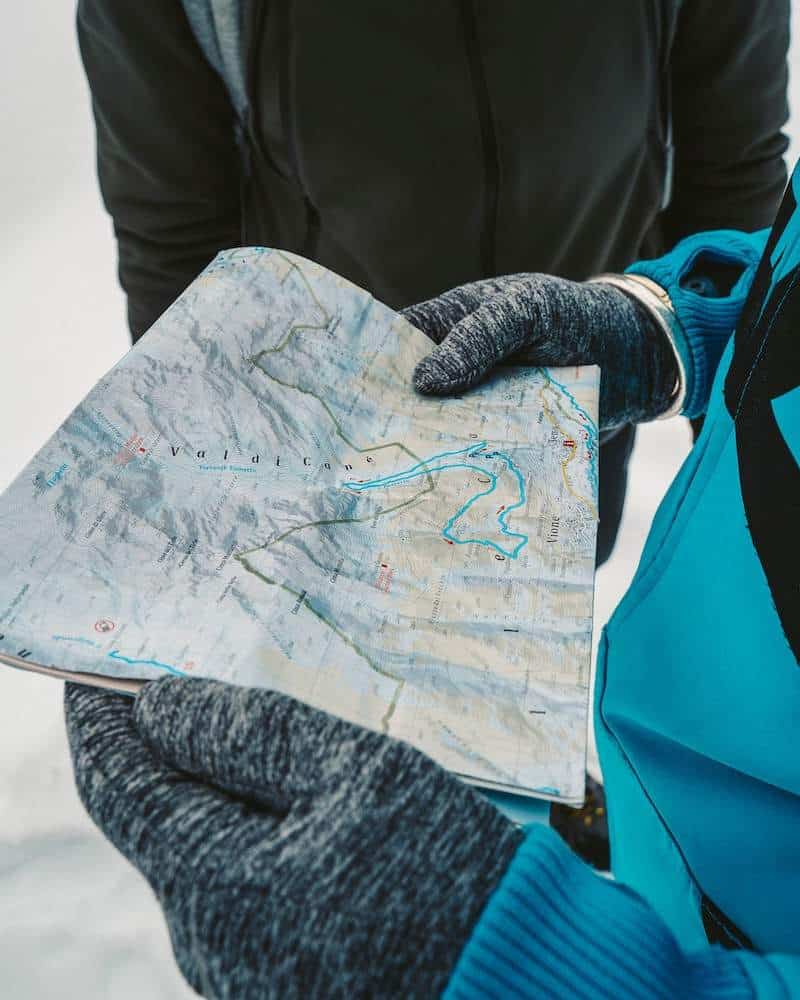
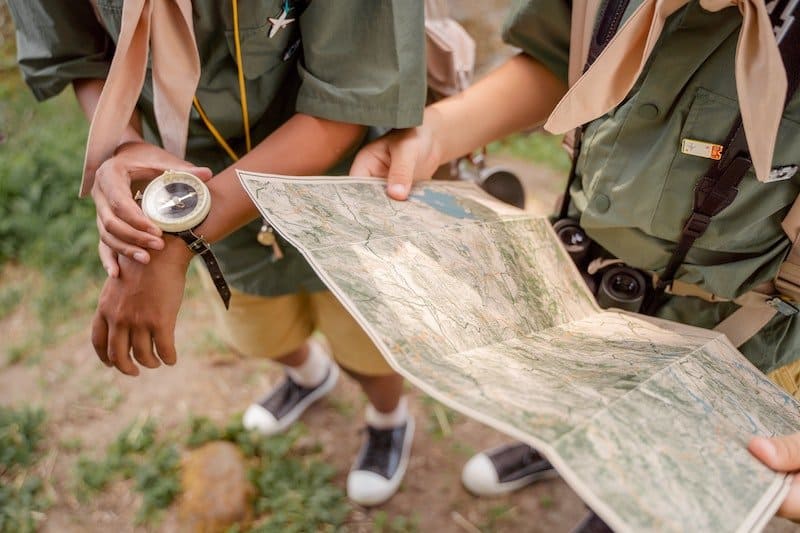
Always take a means of navigation & communication
Even if you’re hiking in a group, it would be irresponsible to venture out without a means of knowing where you’re going and how to reach help if you need it.
On a solo hiking trip, you are the only person responsible for your safety and survival.
Even mountaineers and outdoor enthusiasts with decades of outdoors and wilderness experience carry a basic form of navigation and communication. If they do it, you probably should too.
Learning how to use a paper map and compass is the most reliable way to navigate in the backcountry or wilderness.
If you don’t have these skills (yet), download a GPS navigation app to your phone in the meantime. Popular apps like AllTrails, Komoot, Gaia GPS and (in New Zealand) NZ Topo Maps allow you to load and/or record gpx routes and turn on GPS to track your progress.
If you want more features, consider purchasing a dedicated GPS device like the Garmin GPS map 66i.
You’ll also need a means of communicating with emergency services if something goes wrong.
At minimum this could be your phone. But this only works
a) if you’re hiking in an area with cellphone coverage (let’s be honest, many trails don’t have coverage) and
b) you have enough battery left (your battery will drain faster if you’re also using your phone to navigate, take photos, update your social media etc.).
To conserve phone battery, pop your phone in airplane or low power mode. Depending on your phone, this could give you 25-50% more battery life. Consider purchasing a backup battery supply. Companies such as Anker have various options to choose from depending on how much juice you need. Check out their 5,000, 10,000 and 20,000 maH battery banks.
To be 100% safe and secure in an emergency, however, your best investment is a Personal Locator Beacon (PLB). These devices have batteries which last years, and they use the global satellite network to send emergency signals regardless of whether there’s cellphone coverage or not. Because they don’t require charging or a subscription, they are safer and more reliable than other devices which have in-built SOS functionality. My PLB of choice is the ACR Resqlink 425.
4 — Make a detailed plan (& stick to it)
I’ve already talked about how important it is to do your research before you head out on a solo hiking trip. Making a plan is a way to guarantee you’ve asked and answered all the important questions, and haven’t forgotten to think of something.
A very basic plan for a hiking trip should include the following:
- Track name
- Group members (& their experience levels, & specific needs)
- Start location/time
- End location/time
- Day(s)/Time(s) your emergency contact should expect to hear from you
- Rough distance / est. time to complete
- Intended route / direction
- Expected weather forecast
- Is there cellphone coverage?
- What are the track hazards?
- Where are the important features (river crossings, bridges, passes, peaks etc.)
- When will it get dark?
- Where are your turnaround points?
- Emergency contact details
Once you’ve put together your plan, your only job then is to stick to it!
The first thing rescue and emergency services will do if they need to come looking for you is ascertain your route. This is far easier if you’ve told someone exactly the route you intend to take (including where you intend to stop and take breaks) and stuck to that plan.
Rescue parties will then be able to use their unique skills to find you much faster, increasing your chances of survival.
5 — Give someone your plan
Leaving your plan with your emergency contact, and asking them to check in if they haven’t heard from you by the date and time of your expected departure from the trail, is the best way to ensure help reaches you quickly if you need it.
Make sure you choose your emergency contact (the person you’re giving your plan to) carefully because they could literally be the difference between life and death.
Make sure they know it’s their responsibility as your emergency contact to:
- check in on the agreed date and time to make sure you have safely made it to the end of the trail.
- set a reminder if necessary to ensure they don’t miss it.
- trigger emergency services if you haven’t contacted them or if they haven’t had a response from you by an agreed time.
Discuss your plan thoroughly with them, including when you expect to finish your hike and when you expect them to have heard from you (if this is different). You may need to allow time to drive to/from the nearest cellphone coverage if there isn’t any at the trailhead.
6 — Listen to your body/mind & respect it
We often don’t pay attention to or are aware of what’s happening in our own bodies. Sometimes an illness or injury can have a physical reaction which prevents us from thinking clearly.
Which is why in many hiking related incidents it’s often a third party who diagnoses a potential issue in someone before they realise it themselves.
This is where solo hiking can be a disadvantage over group hiking. When solo hiking you need to be much more attuned to your own body so you can better and more quickly understand when something is wrong.
You also need to get used to (and practice) looking after yourself properly when you’re out on the trail alone. This includes:
- Taking regular breaks – more often and for longer than you would if in a group.
- Drinking plenty of water – more than you think you need and more often.
- Making sure to pack (and use) the necessary protection from the sun and other weather – apply sunscreen, hat and sunglasses early in hot weather, and put your rain gear on before it starts pouring down and your hiking clothes get saturated.
It also means being able to recognise when you’re out of your comfort zone and not being afraid to call it quits.
Research and learn to recognise the signs of common outdoor-related illnesses such as fatigue, sunstroke, dehydration and hypothermia early so you can prevent the full-blown consequences before they become life-threatening.

7 — Make good decisions
When hiking alone, it is essential to make good decisions in order to stay safe and ensure a successful hike. It can be easy to underestimate the risks involved when out on your own, but there are certain measures that should always be taken in order to avoid any dangerous or unpleasant situations.
Know your limits & don’t be afraid to turn back
When out on the trail alone, it is important to know your own limits and not be afraid to turn back if you’re not comfortable with what lies ahead. If you are feeling unsure of anything at all – whether that be the terrain, conditions, weather or something else – turning around and heading back is often the safest option.
Don’t put your safety on the line. Come back with a group, or do some more research and try another day (perhaps in better conditions).
Use the ‘hiker grapevine’ for real-time information
More relevant on longer or overnight solo hikes, stopping to talk to other hikers on the trail is a great way to get an idea of trail conditions, potential risks and hazards. This is especially true if the person is hiking in the opposite direction to you. They are best placed to let you know if there’s anything up ahead you need to be aware of.
If you’re in an unfamiliar region, you’re also likely to encounter a fair few locals who know more about the usual conditions and weather patterns on the trail. Aside from good safety tips, they might also be able to alert you to some neat things to see along the way that you otherwise might have missed.
Don’t panic
One of the biggest reasons why hikers (solo hikers in particular) get into trouble in the wilderness is because they get into a difficult situation… and then panic.
Panic is a natural reaction to feeling overwhelmed and out of control, but it can quickly lead to making bad decisions that only exacerbate the situation.
If you find yourself lost or up against another situation which makes you feel uncomfortable, first stop for a few minutes and take a deep breath. You might even decide to sit down for a short while and have something to eat or drink.
Your response will depend on what it is you’ve come up against. If lost:
- Focus on where you’ve been and how you got to where you came. Perhaps you can retrace your steps.
- Do you remember walking past a significant landmark or feature (i.e. were you following a river, was there a big boulder, log or tree)? Can you see it from your current location or find your way back to it easily?
- Did you accidentally take a wrong turning at a junction? Can you follow a track back to the junction?
- When do you last remember seeing a track marker? Was it 2 minutes ago, 5 minutes ago, 30 minutes ago?
If you’ve come up against an obstacle (i.e. an unbridged river, or a steep rocky climb):
- Is there a way to get around the obstacle safely (i.e. an alternate route or a bridge)?
- Are there any other hikers around who can help you overcome the obstacle?
- Is the obstacle outside of your skillset and do you need to turn around?
By taking a deep breath, stopping your forward progress and not allowing panic to take hold you’re more likely to make a safe and sensible decision and rectify your situation.
Conclusion
When it comes to hiking alone, safety should always be your first priority. By following the tips for hiking alone outlined in this post, you can ensure you’ll have a safe and successful hike.
Remember, hiking alone requires you to be prepared and vigilant. Knowing your limits, when to turn back and not pushing yourself too hard will help you avoid any dangerous or unpleasant situations while out on the trail alone.
By combining and following these tips for hiking alone, you can enjoy peace of mind knowing you’re taking all the necessary precautions when embarking on a solo journey into nature’s wilderness.